
Why Your Burgers Never Taste Like Restaurant Ones
If you’ve been trying to master the perfect smashed burger grill, you’ve probably had this moment. You take a bite, pause for a second… and think, “Yeah, it’s good… but it’s not that good.”
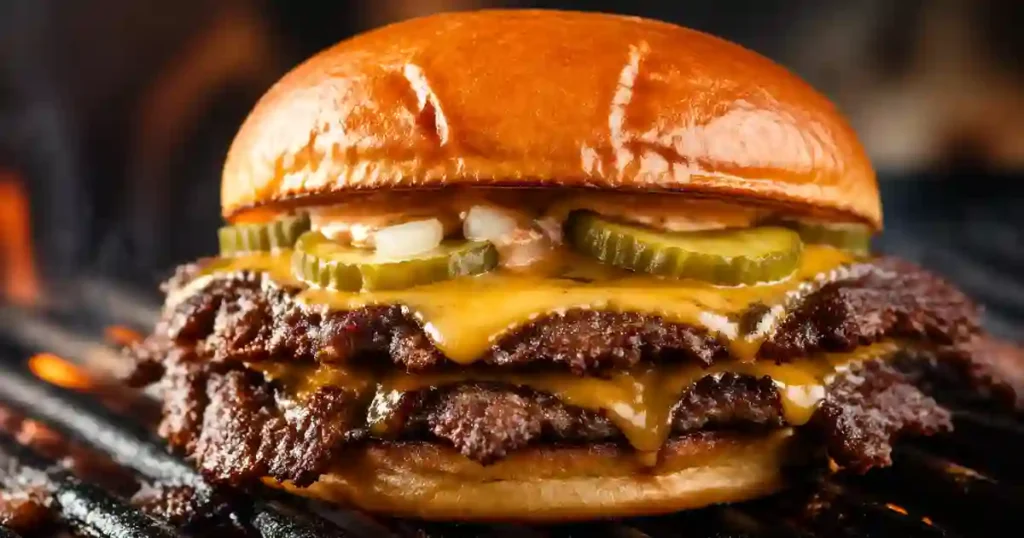
This Classic American Smashed Burger is inspired by the famous diners in the USA, bringing that authentic crispy texture right to your home grill. My recipe is designed to help you cross that bridge from “just good” to “absolutely legendary,” using simple techniques I’ve perfected in my kitchen.
Something’s missing.
Maybe the crust isn’t crispy enough. Maybe the inside feels a bit dry. Or maybe the whole thing just lacks that bold, almost addictive flavor you get from a proper burger joint.
Here’s the thing most people don’t realize right away. It’s not about fancy ingredients or complicated techniques. In fact, it’s almost the opposite. The magic of a smashed burger comes from doing less… but doing it right.
And yeah, I’ll be honest. The first time I heard about smashing a burger flat on a grill, it sounded wrong. Like you’re ruining it on purpose. But then you try it. And suddenly, it clicks.
That deep crust. The juiciness. The flavor explosion from such a simple method. It kind of changes how you think about burgers entirely.
In this guide, you’ll learn exactly how to nail the smashed burger grill technique step by step. No guesswork. No fluff. Just what actually works, including the small details most people overlook.
Is a smashed burger really better than a regular burger?
In most cases, yes. The increased surface contact creates a richer crust and deeper flavor that standard thick patties often lack.
Table of Contents
Table of Contents
Why You’ll Love This Smashed Burger Grill Recipe
- Quick and easy to make, even if you’re not a grill expert
- Uses simple ingredients you probably already have at home
- Creates that crispy, restaurant-style crust that’s hard to replicate with regular burgers
- Perfect for BBQ nights, casual dinners, or impressing friends without trying too hard
- Delivers a juicy center with bold, rich flavor in every bite
What really makes this smashed burger grill recipe stand out is the balance between simplicity and results. You’re not relying on complicated seasoning or techniques. It’s all about timing, heat, and that one decisive smash. There’s something oddly satisfying about hearing that sizzle and knowing you’re about to get a burger that actually lives up to the hype.
What Is a Smashed Burger?
A smashed burger grill method is exactly what it sounds like. You place a ball of ground beef onto a very hot surface and press it down firmly right away.
Not later. Not gently. Immediately and with intention.
The goal isn’t just to make the patty thinner. It’s to maximize contact between the meat and the hot surface. More contact means more browning. And more browning means more flavor.
At first, it might feel counterintuitive. You’d think pressing the meat would squeeze out juices and dry it out. That’s what most people assume. I did too.
But in reality, when done correctly, the outside develops a rich crust while the inside stays juicy. It’s a balance that’s hard to achieve with thicker patties.
What makes it different from regular burgers?
- No pre-shaped thick patties
- Immediate smashing on high heat
- Faster cooking time
- Focus on crust rather than thickness
Simple in theory. But small mistakes can change everything.
Do you need to smash it more than once?
No. One firm press is enough. Repeated smashing actually ruins the texture and drains moisture.
Why Smashed Burgers Taste Better on the Grill
This is where things get interesting.
The reason a smashed burger grill delivers such intense flavor comes down to something called the Maillard reaction. That’s the process where meat browns and develops those deep, savory flavors when exposed to high heat.
The more surface area you create, the stronger that reaction becomes.
And smashing does exactly that.
But it’s not just about science. It’s about contrast.
- Crispy edges
- Juicy center
- Slightly charred, flavorful crust
That combination hits differently. You notice it immediately.
There’s also something psychological about it. That first bite with a slight crunch followed by juicy meat… it just feels more satisfying. Hard to explain, but you’ll get it once you try.
Why regular burgers often fall short
- Too thick
- Not enough heat
- Too much flipping and handling
And then people wonder why the flavor feels flat.
Can you use any grill for this?
Yes, but you need a very hot, flat surface. A cast iron plate or griddle works best.
How to Prepare Your Grill for Smashed Burgers
Before anything else, your setup matters more than you think.
A proper smashed burger grill starts with heat. Not medium heat. Not “kind of hot.” It needs to be seriously hot.
If the surface isn’t hot enough, you won’t get that crust. And without the crust, the whole method kind of falls apart.
Ideal temperature
- Surface temperature: around 480–570°F (250–300°C)
- Hotter is usually better than cooler
If you’re unsure, a quick test helps. Hold your hand a few inches above the surface. If you have to pull away within two seconds, you’re in the right zone.
Setup steps
- Preheat your grill fully
- Place a cast iron plate or griddle
- Let it heat thoroughly
- Lightly oil the surface
Then move fast. Timing matters more than people expect.
Can you do this directly on grill grates?
You can… but it’s not ideal. You lose surface contact, which means less crust and less flavor.
How to Grill a Smashed Burger Step by Step
This is where everything comes together. And honestly, this is also where most people mess it up.
Step 1: Prepare the meat
- Use ground beef with about 20 percent fat
- Form loose balls
- Do not season yet
Step 2: Place on the hot surface
As soon as it hits, be ready.
Step 3: Smash immediately
Press down firmly using a spatula or burger press. Hold for about 5 to 10 seconds.
This moment is crucial.
Step 4: Season
Add salt and pepper after smashing.
Step 5: Leave it alone
This is harder than it sounds. Don’t touch it. Let the crust form.
Step 6: Flip once
When the edges look crispy and browned, flip it.
Step 7: Add cheese
Optional, but highly recommended.
Step 8: Finish cooking
Give it another 30 to 60 seconds.
Done.
How thin should the patty be?
Thin, but not falling apart. Around a quarter inch is a good target.
See how to make this recipe in the video below
Common Mistakes When Making Smashed Burgers
This is where things usually go wrong.
A smashed burger grill is simple, but not very forgiving.
Common mistakes
- Not enough heat
- Smashing multiple times
- Using lean meat
- Flipping too early
- Overcooking
And the result? Dry, bland burgers with no crust.
Why isn’t my burger crispy?
Almost always, it’s because the surface isn’t hot enough or you moved it too soon.
Grill vs Pan: Which Is Better?
This question comes up a lot. And the answer isn’t as obvious as you might think.
A smashed burger grill on a proper griddle is amazing. But a heavy pan can produce almost identical results.
Grill advantages
- Slight smoky flavor
- More cooking space
- Outdoor experience
Pan advantages
- Better heat control
- Consistent results
- Easier for beginners
If I’m being honest, I use both. It depends on the situation.
What’s better for beginners?
A pan. It’s easier to control heat and timing.
Building the Perfect Smashed Burger
You nailed the patty. Don’t ruin it with bad assembly.
A great smashed burger grill deserves a simple, balanced build.
Essentials
- Soft bun, lightly toasted
- Melted cheese
- Simple sauce
- Minimal toppings
Classic build
- Bottom bun
- Sauce
- Patty
- Cheese
- Onions
- Pickles
- Top bun
Keep it simple. Too many toppings can overpower the flavor.
_compressed")
What sauce works best?
A basic mix of mayo, ketchup, and mustard usually does the job perfectly.
TLDR: Smashed Burger in 60 Seconds
- Heat grill very hot
- Place meat ball
- Smash immediately
- Season
- Do not move
- Flip once
- Finish quickly
That’s it.
Serving and Storage Tips
Serving Suggestions
To get the most out of your smashed burger grill, presentation and pairing matter more than people think.
- Serve immediately while the patty is still hot and crispy
- Lightly toast the buns for added texture
- Pair with classic sides like fries, potato wedges, or a simple coleslaw
- Add a pickle spear or extra sauce on the side for balance
- If you’re hosting, consider making double patties for a more indulgent feel
Honestly, a fresh smashed burger doesn’t need much. Keep it simple and let the flavor do the work.
Storage and Reheating
If you somehow end up with leftovers, here’s how to handle them:
- Store cooked patties in an airtight container in the fridge for up to 3 days
- Avoid storing assembled burgers to prevent soggy buns
- Reheat in a hot pan or skillet for best results
- Skip the microwave if possible, it ruins the texture
- Add a tiny bit of oil when reheating to bring back some crispiness
Helpful Notes
- Use ground beef with around 20 percent fat for the best balance of flavor and juiciness
- Don’t overwork the meat when forming balls, keep it loose
- Smash only once, multiple presses will dry out the burger
- If you don’t have a grill, a heavy cast iron pan works just as well
- Experiment with cheese types like American, cheddar, or even pepper jack
- For a twist, try adding caramelized onions or a smoky sauce
Sometimes the smallest tweaks make the biggest difference. You might find your own version ends up slightly different, and that’s kind of the point.
Nutrition (Per Serving – Approximate)
- Calories: 450–550 kcal
- Protein: 25–30 g
- Fat: 30–35 g
- Carbohydrates: 25–30 g
- Fiber: 1–2 g
- Sugar: 4–6 g
- Sodium: 600–800 mg
Keep in mind, nutrition can vary depending on bun choice, toppings, and portion size.

Smashed Burger Grill Recipe
Ingredients
Burger Patties
- 500 g ground beef 80/20 fat ratio preferred
- 1 tsp salt to taste
- 0.5 tsp black pepper
Assembly
- 4 burger buns soft, lightly toasted
- 4 slices cheese American or cheddar
- 0.25 cup onions thinly sliced
- 0.25 cup pickles sliced
- 3 tbsp burger sauce mix of mayo, ketchup, and mustard
Instructions
- Preheat your grill with a cast iron plate or griddle until very hot, around 250–300°C.
- Divide the ground beef into 4 loose balls without overworking the meat.
- Place each ball onto the hot surface and immediately smash it flat using a spatula or burger press.
- Season each patty with salt and black pepper right after smashing.
- Let the patties cook undisturbed for 2 to 3 minutes until a deep crust forms.
- Flip the burgers once and cook for another 1 minute.
- Add a slice of cheese on top and allow it to melt while finishing cooking.
- Remove from heat and assemble burgers with buns, sauce, onions, and pickles.
- Serve immediately while hot and crispy.
Notes
Frequently Asked Questions (FAQ)
Why is my smashed burger not crispy?
This usually comes down to heat. If your grill or pan isn’t hot enough, you won’t get that signature crust. Also, avoid moving the patty too early.
Can I make smashed burgers without a grill?
Yes, absolutely. A cast iron pan or heavy skillet works extremely well and gives you more control over heat.
What’s the best meat for smashed burgers?
Ground beef with about 20 percent fat is ideal. Lean meat won’t give you the same flavor or juiciness.
How thin should a smashed burger be?
It should be thin enough to create a crust but thick enough to stay juicy. Roughly a quarter inch is a good guideline.
How hot should the grill be?
Very hot. Around 480–570°F at the surface.
Can I use frozen beef?
It’s not recommended. Fresh meat works much better.
How many times should I smash the burger?
Only once. More than that reduces quality.
What meat is best?
Ground beef with about 20 percent fat.
Conclusion: Why It’s Worth Trying
A proper smashed burger grill isn’t complicated. But it does require a bit of precision and restraint.
Less shaping. Less interference. More trust in heat and timing.
And once you get it right, it’s hard to go back. That crispy edge, the juicy center, the flavor that feels just a little more intense than usual.
Maybe I’m exaggerating. Or maybe not.
Either way, the only real way to know is to try it yourself.
For delicious and easy recipes, follow me on my Facebook and Pinterest

If you enjoyed this recipe, feel free to leave a comment below or follow me on my culinary journey!"

This recipe was written and tested by Rasha, the founder of Recipesedeas. Rasha is a food enthusiast living in the USA, sharing her family-inspired recipes and culinary adventures
