

The first thing you notice is the aroma. Warm spices fill the kitchen, rice steams gently, and the pot feels like a promise waiting to be opened. Chicken Biryani is not just food; it is a celebration, patience, and pride passed down through generations. This authentic recipe comes from a family table, taught by watching hands rather than reading notes, and perfected after many shared meals.
A great biryani is about control, not shortcuts. The rice must stay separate, and the chicken must remain tender. Both must finish cooking together, rather than fighting each other in the pot. Many home cooks struggle here, resulting in mushy rice or dry meat. This guide is designed to eliminate that frustration, helping you master fluffy grains, juicy chicken, and deep, layered flavors every single time.

Chicken Biryani
Ingredients
Chicken Marinade
- 1.5 kg bone-in chicken pieces
- 1 cup plain yogurt room temperature
- 2 tbsp ginger paste
- 2 tbsp garlic paste
- 1 tsp turmeric powder
- 2 tsp red chili powder adjust to taste
- 2 tsp garam masala
- 1.5 tsp salt
- 2 tbsp lemon juice fresh
- 0.5 cup fresh mint leaves chopped
Rice
- 3 cups basmati rice
- 8 cups water for boiling
- 2 pieces bay leaves
- 4 pieces green cardamom pods
- 4 pieces cloves
- 1 piece star anise
- 1 tsp cumin seeds
Cooking and Layering
- 0.25 cup ghee
- 2 cups onions thinly sliced and fried until golden
- 0.25 tsp saffron strands soaked in warm milk
- 0.25 cup milk warm
- 0.5 cup fresh cilantro chopped
Instructions
- Add chicken to a large bowl and mix with yogurt, ginger paste, garlic paste, turmeric, red chili powder, garam masala, salt, lemon juice, and mint. Coat well using your hands.
- Cover and refrigerate for at least 4 hours, preferably overnight, to allow the chicken to tenderize and absorb flavor.
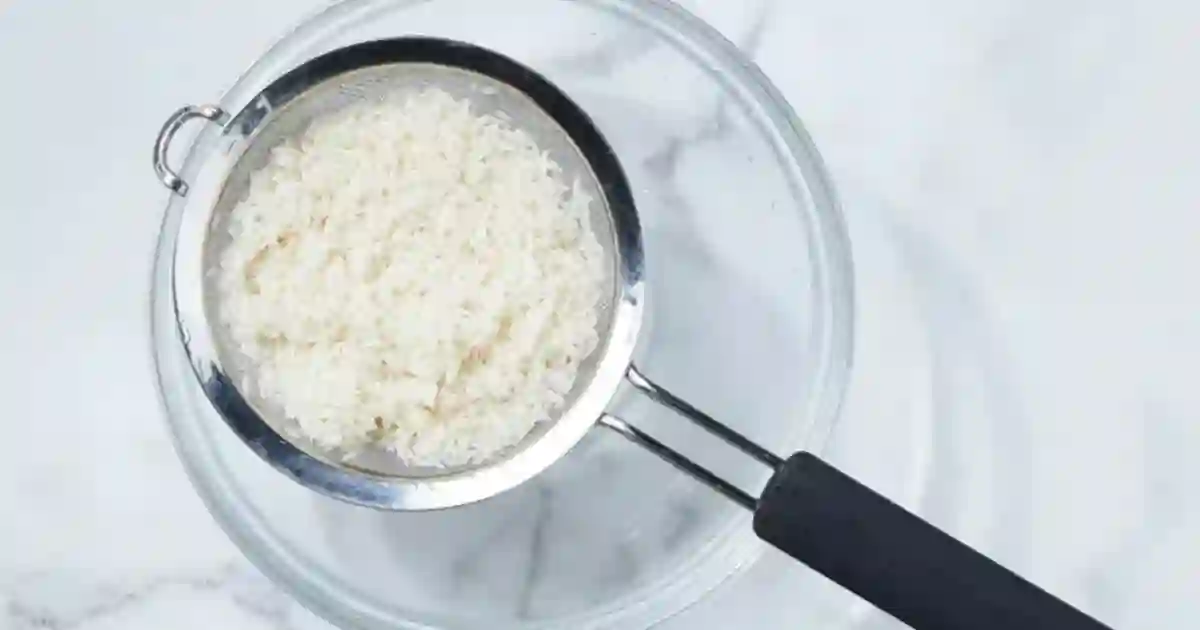
- Rinse basmati rice until the water runs clear, then soak in plenty of water for 30 minutes.
- Bring a large pot of water to a rolling boil. Add salt, bay leaves, cardamom, cloves, star anise, and cumin seeds.
- Add soaked rice and cook until about 70 percent done. Drain immediately and set aside.
- Spread marinated chicken evenly in the bottom of a heavy wide pot.
- Gently layer the parboiled rice over the chicken without pressing or stirring.
- Top with fried onions, saffron milk, chopped mint, cilantro, and drizzle ghee over the surface.
- Seal the pot tightly with foil and a lid, or seal with dough. Place on very low heat and cook for 35–40 minutes.
- Turn off the heat and let the biryani rest for 10 minutes before opening. Fluff gently from the sides and serve hot.
Notes
able of Contents
Table of Contents
Why You’ll Love This Recipe & Style Comparison
Fluffy Rice Every Time: Clear steps help you achieve perfectly separated grains without any guesswork.
Juicy, Tender Chicken: A proven marination technique keeps the meat soft and full of flavor.
Accessible Ingredients: Uses common pantry spices that combine to create a deeply authentic flavor profile.
Perfect for Gatherings: Ideal for comforting family meals as well as special celebrations.
Hyderabadi vs. Awadhi Biryani
| Biryani Style | Cooking Method | Flavor Profile |
| Hyderabadi Style (Used in this recipe) | Raw, marinated chicken cooks directly under layers of partially cooked rice in a sealed pot. | Bold, robust, and spice-forward. |
| Awadhi Style | Chicken curry is fully cooked first, then layered with parboiled rice and steamed. | Mild, delicate, and aromatic. |
This version stands apart because it respects timing and balance. The rice cooks only to the point where it can finish steaming during the final stage, while the chicken absorbs rich spices slowly under low heat.
Ingredients Checklist
To make an authentic chicken biryani, the components are divided into three clear stages: the marinade, the seasoned rice, and the final assembly layers.
Chicken Biryani Ingredients Table
| 1. The Chicken Marinade | 2. The Rice Base | 3. Cooking & Layering |
| • Chicken pieces (bone-in for best flavor) • Plain yogurt (room temperature) • Fresh ginger & garlic pastes • Turmeric powder • Red chili powder (to taste) • Garam masala & Salt • Fresh lemon juice • Chopped mint leaves | • Long-grain Basmati rice • Water (for soaking and boiling) • Whole spices: Bay leaves, green cardamom, cloves, star anise, and cumin seeds | • Ghee (clarified butter) • Onions (sliced thin and fried golden) • Saffron strands (soaked in warm milk) • Fresh cilantro (coriander) for garnish |
How to Make Chicken Biryani Step-by-Step
Step 1: Master the Chicken Marination
Add the bone-in chicken pieces to a large bowl. Mix in the plain yogurt, ginger paste, garlic paste, turmeric, red chili powder, garam masala, salt, lemon juice, and chopped mint. Use your hands to coat every piece thoroughly, ensuring the spices penetrate the meat. Cover the bowl and rest it in the refrigerator for at least 4 hours (overnight yields the absolute tenderest results). The yogurt naturally tenderizes the meat while the lemon brightens the final taste.
Step 2: Parboil the Basmati Rice
Rinse the basmati rice under cold water until the water runs completely clear, then soak it in plenty of water for 30 minutes. This helps the grains lengthen without breaking during cooking. Next, bring a large pot of water to a rolling boil, adding salt and the whole spices (bay leaves, cardamom, cloves, star anise, cumin). Drop in the soaked rice and cook until it is 70 percent done. The grain should break under pressure but still feel firm in the center. Drain immediately to stop the cooking process.

Step 3: Layer for Maximum Flavor Transfer
Take a wide, heavy-bottomed pot and place the raw, marinated chicken evenly across the bottom. Gently spread the parboiled rice directly on top of the chicken without pressing it down. Keep the layers loose and separate. Do not stir. Stirring at this stage breaks the delicate rice grains and mixes moisture unevenly, resulting in a mushy texture.
Step 4: Garnish and Seal the Dum
Drizzle the saffron-infused milk in small circles across the surface so the color spreads in beautiful, natural patches. Scatter fresh mint and cilantro over the top, and spoon a layer of ghee lightly across the rice to add richness.
Seal the pot tightly so absolutely no steam can escape. Place a layer of aluminum foil securely over the rim before pressing the lid down firmly, or seal the edges of the lid with a simple flour dough.

Step 5: Steam and Rest
Place the sealed pot over low heat. The trapped steam (Dum) will finish cooking the rice gently while cooking the chicken completely in its own juices. The biryani is ready when the rice at the top feels fully soft and you no longer hear steam sizzling at the bottom of the pot. Turn off the heat and let the pot rest covered for 10 minutes before opening to allow the moisture to settle.
The Science of Dum Cooking
Dum cooking traps steam inside the pot. That steam finishes the rice and cooks the chicken at the same time. The sealed environment keeps moisture inside and lets flavors move between layers without stirring.
See how to make this recipe in the video below
Pro Tips and Common Problems Solved
Avoid Tough or Dry Chicken: This is caused by rushing the process or skipping the marinade. Ensure you use bone-in pieces, give them at least 4 hours to rest in yogurt, and keep the heat low during steaming.
Preventing Scorched Bottoms: Always use a wide, heavy pot. If your stovetop runs hot, you can place a flat tawa or iron skillet underneath your biryani pot during the Dum stage to distribute the heat evenly.
Achieving Vibrant Colors: Stick to natural saffron milk and perfectly fried golden onions. Avoid artificial food colorings to maintain a classic, high-quality presentation.
Biryani vs. Pulao: Remember that Biryani relies on distinct layering and steaming raw or semi-cooked components together, whereas Pulao cooks the meat, rice, and broth together in a single stage with lighter spicing.
Building the Masterpiece The Art of Layering and Sealing the Dum
How to Layer Your Chicken Biryani for Maximum Flavor Transfer
Start with the marinated chicken or cooked curry at the bottom of a wide heavy pot. This base forms the foundation of the Chicken Biryani and allows heat to reach every piece evenly. Add the parboiled rice gently on top without pressing it down. Keep the layers loose and separate. Do not stir. Stirring breaks the rice and mixes moisture unevenly, which leads to soft grains. Proper layering allows steam to rise through the rice while flavor moves upward from the chicken. This balance is what gives Chicken Biryani its depth and structure.
The Garnish Layer Saffron Mint and Ghee
Finish the Chicken Biryani with the garnish layer. Drizzle saffron milk in small circles across the surface so the color spreads in patches rather than pooling in one spot. Scatter fresh mint and cilantro to release aroma during steaming. Spoon ghee lightly over the top to add richness. This final layer defines the look and smell of the Chicken Biryani before the lid closes.
Sealing the Pot Creating the Perfect Dum Environment
Seal the pot so no steam escapes during the final stage of Chicken Biryani cooking. Place foil tightly over the rim, then press the lid firmly on top, or seal the lid with soft dough around the edge. Both methods trap steam inside the pot. Trapped steam cooks the rice gently and finishes the chicken without drying it out. Keep the heat low once the pot is sealed.
Final Check When Is the Chicken Biryani Truly Done
The Chicken Biryani is ready when the rice at the top feels fully soft and there is no steam sound coming from the pot. Turn off the heat and let it rest for ten minutes before opening. This resting time allows moisture to settle and helps the grains stay firm during serving.

Serving and Storage Tips
How to Serve
Serve your biryani piping hot straight from the pot. When dishing it out, fluff it gently from the side of the pot using a flat spoon to keep the distinct white, orange, and spiced layers intact. Pair it with a cool cucumber raita or a fresh salad to balance the warm spices.
Storage and Reheating
| Storage Method | Maximum Duration | Best Practices |
| Refrigerator | Up to 2 Days | Allow the biryani to cool completely before transferring it to a shallow, airtight container. |
| Reheating | Ready in 5 Minutes | Place portions in a pan, add a tiny splash of water, cover with a tight lid, and warm over low heat to restore moisture. |
Helpful Notes
- Always use a wide heavy pot to avoid burning
- Do not stir once layers are set
- Use bone in chicken for better taste
- Keep heat low during dum to avoid scorching
- Let the biryani rest ten minutes before opening the lid
These small details decide whether the dish feels average or special.
Conclusion
Chicken Biryani succeeds when timing and care come first. This method protects the rice so each grain stays long and light. It also treats the chicken with patience so it stays soft and full of spice. When these two parts meet under gentle steam, the result feels rich without being heavy.
This recipe works because every step has a clear purpose. Nothing is rushed. Nothing is guessed. If you follow the guide, you will serve biryani that looks beautiful and tastes balanced from the first bite to the last.
If you tried Chicken Biryani recipe, leave a star rating and share how it turned out. Tell us what changes you made or what style your family prefers. Save it for later and share it with friends who love real home cooked food.
Frequently Asked Questions
What is Chicken Biryani made of?
Chicken Biryani uses basmati rice, chicken, yogurt, whole spices, herbs, and ghee. These parts cook in stages and finish together through steaming.
What exactly is biryani?
Biryani is a rice dish where meat and rice cook in layers using steam. This method keeps flavors locked inside and sets it apart from simple rice dishes.
What type of biryani is best?
That depends on taste. Hyderabadi biryani is bold and spice forward. Awadhi biryani is mild and rich. Both are authentic.
What does biryani taste like?
It tastes aromatic and layered. You get warmth from spices, richness from ghee, freshness from herbs, and light sweetness from fried onions.
Is Chicken Biryani very spicy?
It does not have to be. You control the heat through chili powder. Reduce it for mild flavor or increase it for more heat.
Is biryani healthy or unhealthy?
It is balanced but filling. It provides protein and carbs. You can lighten it by using less ghee and lean chicken cuts.
Can I use a non-Basmati rice variety for this recipe?
While you can use other varieties, long-grain Basmati rice is highly recommended. It provides a unique elongation, thin profile, and distinct floral aroma that other types of rice cannot match.
Is biryani a healthy meal option?
It is a wonderfully balanced meal that offers plenty of protein and carbohydrates. If you prefer a lighter version, you can utilize skinless, lean chicken cuts and slightly reduce the amount of ghee used for layering.
Nutrition Information & Estimates
The nutrition values below are an approximate estimate per standard serving cup:
- Calories: 540 kcal
- Total Carbohydrates: 62 g
- Protein: 34 g
- Total Fat: 16 g
- Saturated Fat: 6 g
- Dietary Fiber: 3 g
- Sugars: 4 g
- Sodium: 680 mg
Conclusion
A great Chicken Biryani succeeds when timing, patience, and care come first. This traditional method protects the delicate basmati grains so they stay long and light, while treating the chicken with the patience needed to keep it soft and infused with spice.
When these elements meet under gentle, sealed steam, the result is an incredibly rich, well-balanced meal that looks as beautiful as it tastes.
If you tried this family-style Chicken Biryani recipe, leave a star rating and share how it turned out in the comments below! Save this guide for your next weekend project, and share it with friends who love real, home-cooked food. For more delicious step-by-step recipes, follow me on Facebook and Pinterest!
If you enjoyed this Chicken Biryani Recipe, you will love my another recipes too
. Authentic Spaghetti Carbonara
If you enjoyed this recipe, feel free to leave a comment below or follow me on my culinary journey!

This recipe was written and tested by Rasha, the founder of Recipesedeas. Rasha is a food enthusiast living in the USA, sharing her family-inspired recipes and culinary adventures