
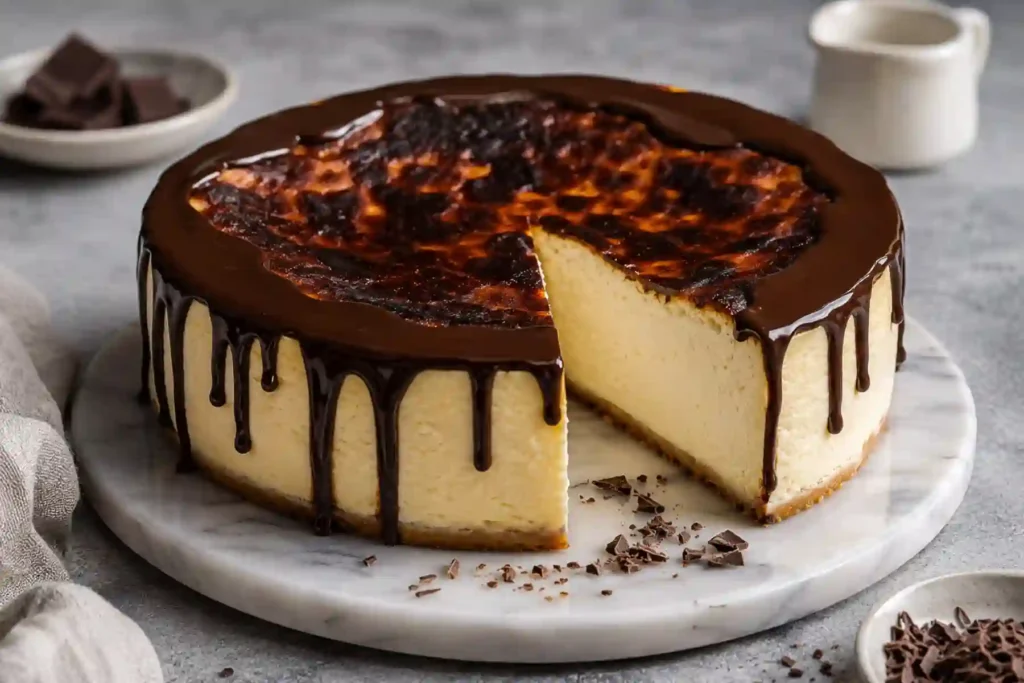
If you have spent any time scrolling through social media lately, you have likely seen videos of a gorgeous, ultra-creamy cheesecake being smothered in a rich, cascading waterfall of warm chocolate sauce. That is the famous San Sebastian cheesecake, and it has taken the global dessert world by storm.
While the traditional version requires a high-heat bake to achieve its iconic burnt exterior, this no-bake San Sebastian cheesecake gives you that exact same velvety, melt-in-your-mouth custard texture without ever turning on your oven. It is the ultimate effortless summer dessert rich, decadent, and beautifully balanced by a silky chocolate drizzle.
Table of Contents
Table of Contents
What is a San Sebastian Cheesecake?
Originating from the Basque Country in San Sebastián, Spain, the traditional Basque burnt cheesecake is famous for its lack of a crust, its intentionally scorched top, and its deeply creamy, almost gooey center. Unlike classic New York-style cheesecakes that are dense, structured, and baked slowly in a water bath, a San Sebastian cheesecake is all about a rustic appearance and a custard-like texture.
The No-Bake Evolution
This innovative no-bake version captures the absolute best part of the viral trend: the signature velvety interior. By skipping the oven, we eliminate the risk of cracking, overbaking, or drying out the cake. Instead, you get a pristine, silk-textured filling that serves as the perfect canvas for a warm chocolate pour, creating a striking contrast that looks like it came straight from a luxury café.
Why You’ll Love This Effortless No-Bake Version
No Oven Required: Perfect for warm weather when you want a showstopping dessert without heating up your kitchen.
Foolproof Texture: Achieve a rich, mousse-like creaminess without worrying about complicated baking techniques or water baths.
Beginner-Friendly: Made with just a handful of simple, accessible ingredients and minimal prep time.
Stunning Presentation: The contrast between the pale, smooth cheesecake and the glossy, cascading dark chocolate drizzle makes it incredibly photogenic and perfect for social media sharing.
Ingredients and Substitutions for No-Bake San Sebastian Cheesecake
To achieve that signature velvet texture, using full-fat dairy products is essential. Here is your shopping checklist for this decadent dessert.
No-Bake San Sebastian Cheesecake Ingredients Table
| 1. The Cheesecake Base | 2. The Chocolate Drizzle (Ganache) | 3. Optional Garnishes |
| • 600 g Cream cheese (softened) • 300 ml Heavy whipping cream • 120 g Powdered sugar • 2 tsp Vanilla extract • 10 g Gelatin powder (optional for stability) • 3 tbsp Cold water (to bloom gelatin) | • 150 g High-quality dark chocolate (chopped) • 150 ml Heavy cream | • Fresh raspberries or strawberries • Fine chocolate shavings • A dust of premium cocoa powder • A pinch of flaky sea salt |
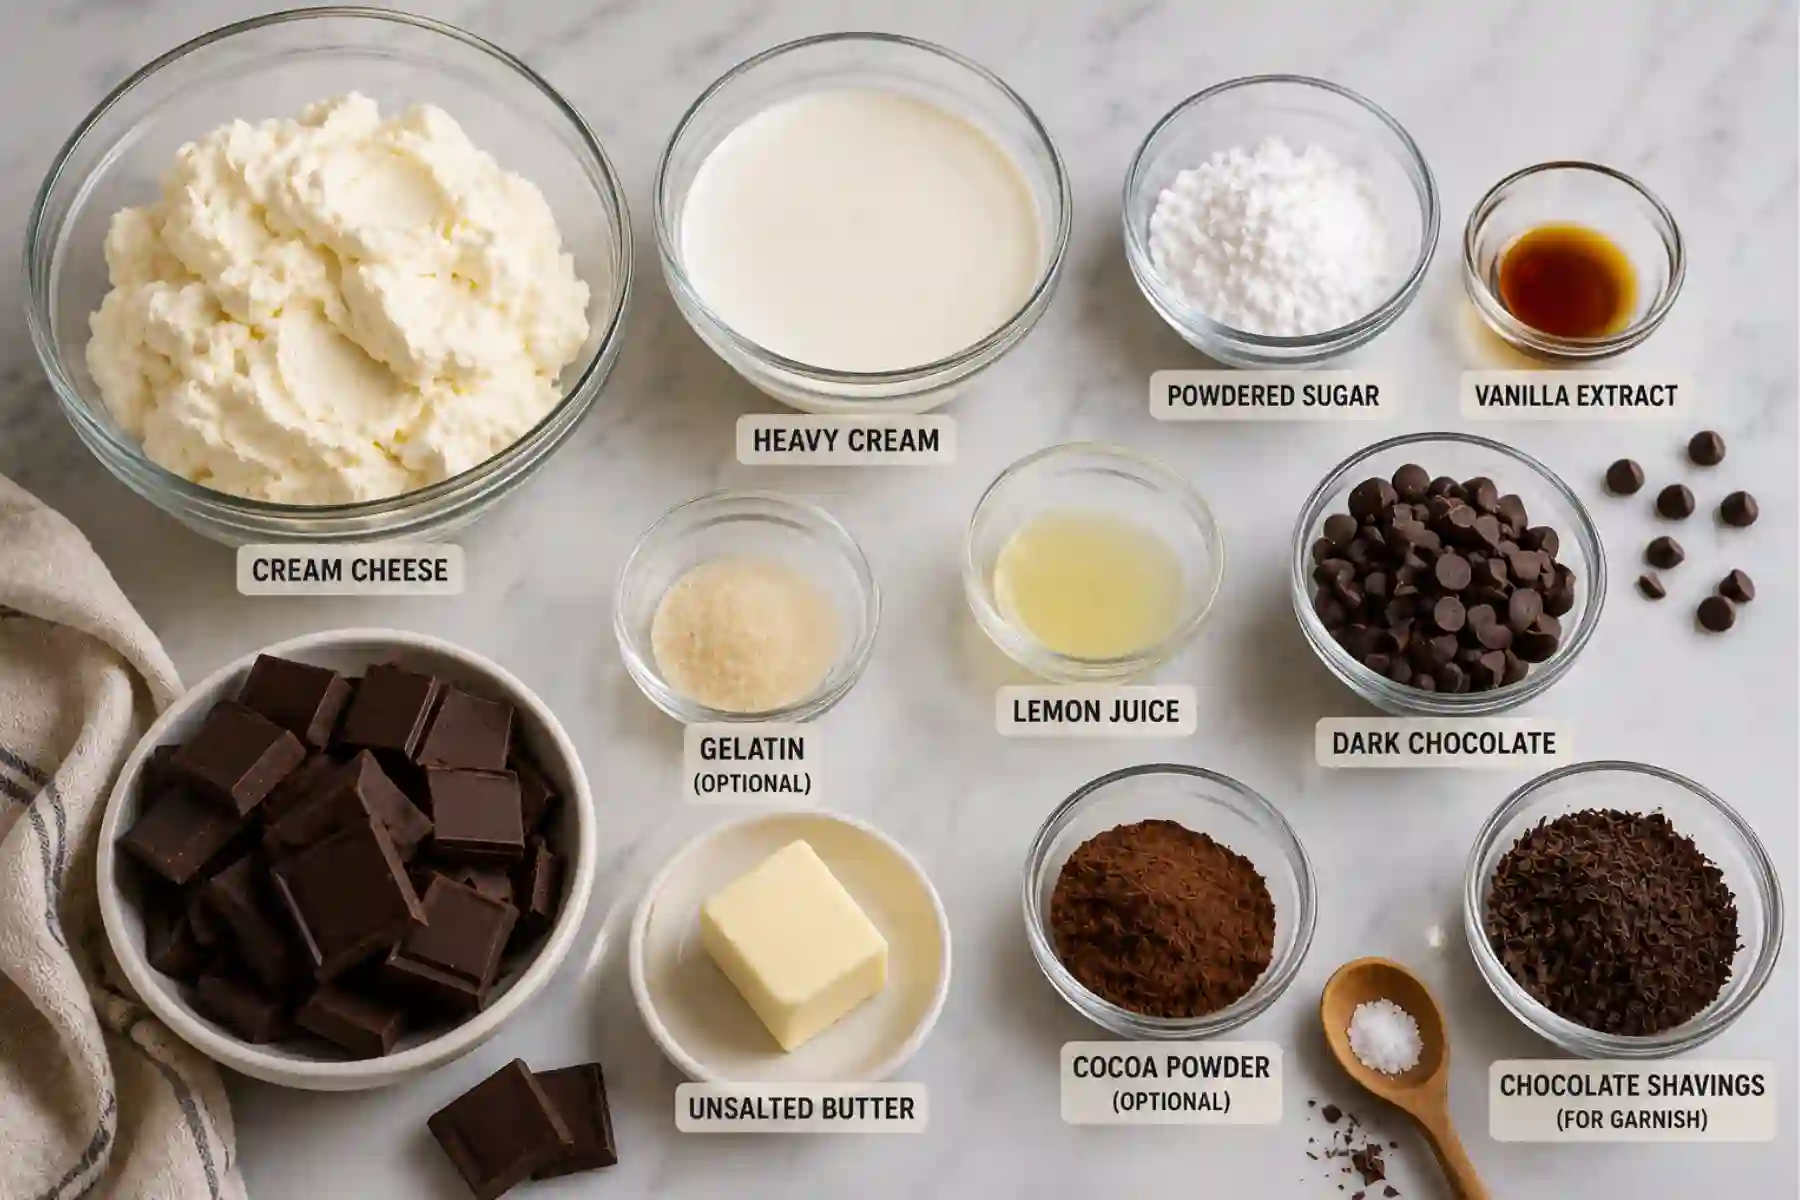
Ingredient Note: If you prefer a completely authentic, ultra-soft custard center and plan to serve the cheesecake straight from a springform pan or a dish, you can omit the gelatin. However, if you want clean, beautiful slices that hold their shape on a plate, including the gelatin is highly recommended.
How to Make No-Bake San Sebastian Cheesecake Step-by-Step
No-Bake San Sebastian Cheesecake

Equipment
- Large mixing bowl
- Electric mixer
- Spatula
- Small bowl
- Microwave-safe bowl
- 8-inch springform pan
- Parchment Paper
Ingredients
Cheesecake Base
- 600 g cream cheese, softened
- 300 ml heavy whipping cream
- 120 g powdered sugar
- 2 tsp vanilla extract
- 10 g gelatin powder optional, for stability
- 3 tbsp cold water for blooming gelatin
Chocolate Drizzle (Ganache)
- 150 g dark chocolate, chopped high-quality
- 150 ml heavy cream
Optional Garnishes
- fresh raspberries or strawberries optional
- chocolate shavings optional
- premium cocoa powder for dusting
- flaky sea salt pinch, optional
Instructions
- If using gelatin, sprinkle the gelatin over the cold water and let it bloom for 5 minutes. Microwave for 10–15 seconds until melted and clear. Allow to cool slightly.
- In a large mixing bowl, beat the softened cream cheese and powdered sugar until completely smooth and lump-free. Mix in the vanilla extract.
- In a separate chilled bowl, whip the heavy cream until soft peaks form.
- If using gelatin, mix a spoonful of the cream cheese mixture into the gelatin, then whisk it back into the main bowl. Gently fold the whipped cream into the cream cheese mixture until fully incorporated.
- Line an 8-inch springform pan with parchment paper. Pour the filling into the pan, smooth the surface, and gently tap the pan to remove air bubbles.
- Refrigerate for 6–8 hours or overnight until fully set.
- To make the ganache, combine the chopped dark chocolate and heavy cream in a microwave-safe bowl. Heat in 30-second intervals, stirring between each interval, until smooth and glossy.
- Remove the cheesecake from the pan. Pour the warm ganache over the chilled cheesecake, allowing it to cascade down the sides.
- Garnish as desired, slice, and serve chilled.
Notes
Step-by-Step Instructions
Bloom the Gelatin (If Using): Sprinkle the gelatin powder over 3 tablespoons of cold water in a small bowl. Let it sit for 5 minutes to “bloom,” then microwave it for 10–15 seconds until completely melted and clear. Set aside to cool slightly.
Beat the Cheese Foundation: In a large mixing bowl, beat the softened cream cheese and powdered sugar together using an electric mixer until completely smooth, creamy, and free of any lumps. Stir in the vanilla extract.
Whip the Cream: In a separate chilled bowl, whip the heavy whipping cream until it reaches soft peaks.
Combine the Filling: If using gelatin, stir a spoonful of the cream cheese mixture into the liquid gelatin to temper it, then pour the gelatin mixture into the main cream cheese bowl while mixing rapidly. Gently fold the whipped cream into the cream cheese base using a spatula until fully incorporated and airy.
Assemble and Smooth: Line the bottom and sides of an 8-inch springform pan with parchment paper, leaving a bit of overhang. Pour the velvety filling into the pan, smooth the surface with a spatula, and tap the pan gently on the counter to remove air bubbles.
Chill Until Set: Place the cheesecake in the refrigerator for at least 6 to 8 hours. For the cleanest slices and best flavor development, allowing it to set overnight is ideal.
Prepare the Chocolate Pour: Place the chopped dark chocolate and heavy cream in a microwave-safe bowl. Heat in 30-second bursts, stirring in between, until the mixture transforms into a glossy, smooth, pourable ganache.
Drizzle and Serve: Unmold the chilled cheesecake. Just before serving, pour the warm (not hot) chocolate drizzle over the top, letting it cascade naturally down the sides. Cut into generous slices and enjoy cold!
See how to make this recipe in the video below
The Secret to the Perfect Chocolate Pour
Choose the Right Chocolate
The iconic waterfall effect relies entirely on mastering your chocolate ganache consistency:
- Choose the Right Chocolate: Opt for premium dark or semi-sweet chocolate bars (around 50% to 60% cocoa) rather than standard chocolate chips. Real chocolate bars contain more cocoa butter, which melts into a much glossier and smoother sauce.
- The Golden Ratio: Keeping a 1:1 ratio by weight of chocolate to cream ensures a sauce that is thick enough to cling beautifully to the cake, but fluid enough to pour effortlessly.
- Temperature Matters: Never pour boiling hot ganache over a cold cheesecake, or it will melt the top layer of your dairy base. Let the chocolate sauce cool on the counter for about 5 to 10 minutes until it is barely warm to the touch but still perfectly liquid before you make your pour.
Expert Tips for the Ultimate Velvet Texture
Embrace Room Temperature: Never try to blend cold cream cheese. Leave it on the counter for at least 2 hours before starting so it incorporates flawlessly without requiring over-mixing.
Fold, Don’t Stir: When combining your whipped cream into the cheese base, use a gentle, circular folding motion. Aggressive stirring will deflate the air bubbles, making your cheesecake dense instead of mousse-like.
The 10-Minute Rule: Before slicing and adding your warm chocolate pour, let the cheesecake sit at room temperature for about 10 minutes. This softens the dairy fats just enough to unlock maximum creaminess.
Storage and Make-Ahead Guide for No-Bake San Sebastian Cheesecake
Prep & Shelf-Life Table
| Storage Style | Maximum Shelf Life | Best Practices |
| Refrigerated | Up to 5 Days | Store covered in an airtight container. Keep the chocolate drizzle separate and warm it up slightly just before serving individual slices. |
| Make-Ahead Plan | 48 Hours | You can easily prepare the cheesecake base two days in advance. Leave it in the springform pan in the fridge, then unmold and add the fresh chocolate pour on the day of your gathering. |
| Freezing | Up to 1 Month | Freeze the cheesecake without the chocolate drizzle. Wrap the set cake tightly in plastic wrap and foil. Thaw completely overnight in the refrigerator before decorating. |
Frequently Asked Questions (FAQ) for No-Bake San Sebastian Cheesecake
Can I make this cheesecake without gelatin?
Yes! If you omit the gelatin, the texture will be incredibly soft, spoonable, and authentic to a traditional Basque center. However, it will be difficult to cut into structural slices, so it is best served directly from a dish or ramekins.
Why did my cheesecake filling turn out lumpy?
This happens when the cream cheese is too cold when you start mixing. To fix it, you can gently warm the bowl over a pot of simmering water (a double boiler) for a few seconds while whisking vigorously to melt the small lumps
Can I use milk chocolate instead of dark chocolate for the drizzle?
Absolutely. If using milk chocolate, reduce the amount of heavy cream slightly (use a ratio of 100ml cream to 150g milk chocolate), as milk chocolate naturally melts into a thinner consistency than dark chocolate.
How Long Does No-Bake San Sebastian Cheesecake Last?
When stored properly in an airtight container, no-bake San Sebastian cheesecake will stay fresh in the refrigerator for up to 4–5 days. In fact, many people find that the flavor becomes even richer after the first 24 hours as the ingredients have more time to meld together. Just make sure to keep it covered to prevent it from absorbing odors from other foods in the fridge.
Can I Freeze This Cheesecake?
Yes, this cheesecake freezes surprisingly well. Wrap individual slices or the entire cheesecake tightly in plastic wrap, followed by a layer of aluminum foil. Store it in the freezer for up to 2 months. When you’re ready to enjoy it, transfer it to the refrigerator and let it thaw overnight. For the best texture, add the chocolate drizzle after thawing rather than before freezing.
What Chocolate Works Best for the Drizzle?
High-quality dark chocolate containing 60–70% cocoa is often the best choice because it balances the sweetness of the creamy cheesecake. If you prefer a sweeter finish, semi-sweet or milk chocolate works beautifully as well. Avoid chocolate chips when possible, as they contain stabilizers that can make the drizzle less silky and smooth.
Why Is My Cheesecake Too Soft?
A soft cheesecake usually comes down to one of a few common issues:
It hasn’t chilled long enough.
The whipped cream was under-whipped.
Too much liquid was added to the filling.
The gelatin wasn’t activated correctly (if using gelatin).
The ingredient ratios were slightly off.
If the cheesecake feels very soft, give it a few extra hours in the refrigerator. Overnight chilling typically delivers the firm-yet-creamy texture most people are looking for.
Can I Prepare It a Day Ahead?
Absolutely. In fact, making this no-bake San Sebastian cheesecake a day ahead is highly recommended. An overnight chill allows the filling to fully set and develop a smoother, more luxurious texture. Simply keep it refrigerated and add the chocolate drizzle shortly before serving for the freshest presentation.
Nutrition Estimates
The nutrition values provided below are approximate estimates calculated per serving slice (based on a 10-slice yield):
- Calories: 380 kcal
- Total Carbohydrates: 24 g
- Sugars: 19 g
- Protein: 4 g
- Total Fat: 30 g
- Saturated Fat: 18 g
- Sodium: 190 mg
Conclusion
This no-bake San Sebastian cheesecake delivers all the luxurious, creamy drama of the viral dessert trend with absolutely none of the baking stress. Between the airy, vanilla-infused cream cheese base and the rich, glossy chocolate cascade, it is a guaranteed crowd-pleaser that looks stunning on any dessert table.
Prepare it a day in advance, pour the chocolate right in front of your guests, and watch everyone line up for seconds!
If you enjoyed this No-Bake San Sebastian Cheesecake Recipe, you will love my another recipes too
. Easy Refreshing Homemade Peach Lemonade Recipe
. Easy Creamy Rice Cooker Risotto Recipe
. Easy Breakfast Bagel Sandwich Recipe (Better Than a Café)
. Homemade Sushi Recipe: Step-by-Step Guide for Beginners
. Easy Yogurt Cake Recipe (Soft, Moist & One Bowl)
If you loved this effortless, viral dessert guide, make sure to explore my other no-bake treats and easy baking recipes! For daily culinary inspiration and step-by-step videos, follow me on Facebook and Pinterest. Leave a comment below to let me know how your chocolate waterfall turned out!
This recipe was written and tested by Rasha, the founder of Recipesedeas. Rasha is a food enthusiast living in the USA, sharing her family-inspired recipes and culinary adventures