
Why Most Tuna Melt Recipes Fall Short
Let’s be honest for a second. Most tuna melt recipes sound good on paper… until you actually bite into one. Then it hits you. Soggy bread. Overpowering tuna. Cheese that somehow melts and doesn’t melt at the same time. It’s frustrating in a very specific way.
The truth is, a lot of recipes skip the small details that actually make or break a tuna melt recipe. Things like moisture control, heat balance, and even how you mix the tuna matter more than people think. And yet, they’re usually glossed over with “just combine and cook.” That’s where things quietly go wrong.
You’ve probably experienced it. You follow the steps, everything looks fine, but the final result feels… off. Not terrible. Just not something you’d crave again. That’s the gap this recipe fixes.
Table of Contents
Table of Contents
The Secret to the Perfect High-Protein Lunch
Here’s something people don’t always think about when searching for a tuna melt recipe… it’s not just comfort food. It’s actually a pretty solid high-protein lunch when done right.
Tuna is naturally rich in lean protein, which means this sandwich can keep you full longer than most quick meals. But there’s a catch. The way you build it determines whether it stays balanced or turns into something overly heavy.
A lot of recipes overload mayo or cheese, which kind of cancels out that “high-protein, satisfying meal” idea. This version leans into balance instead. Enough creaminess to feel indulgent, but not so much that it feels like you need a nap after.
And maybe this is just me, but there’s something reassuring about a meal that feels both comforting and… slightly responsible. Like you didn’t completely give up on eating well.
What Makes This Tuna Melt Recipe Different
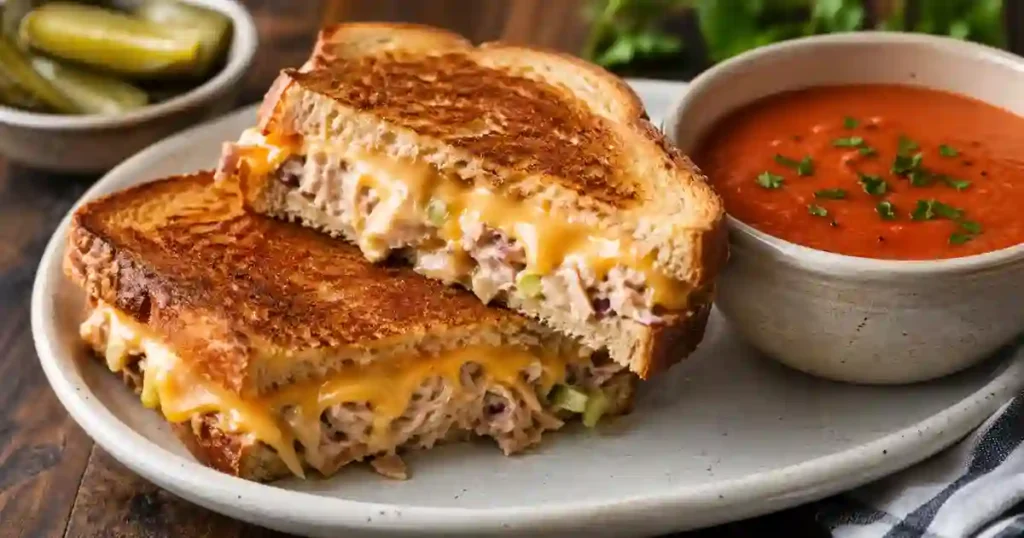
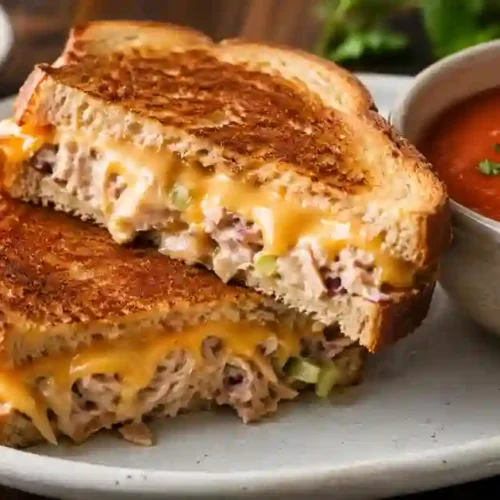
Here’s where things shift a bit. This tuna melt recipe isn’t just about putting tuna and cheese on bread. It’s about contrast. Crispy outside. Creamy inside. Salty, savory, slightly tangy in a way that actually wakes up your taste buds.
Actually, I used to think tuna melts were just “okay.” Something you eat when there’s nothing else around. But once you dial in the ratios and technique, it becomes something else entirely. Comfort food, yes. But with intention.
What makes this version stand out?
- The tuna mixture is balanced, not overloaded with mayo
- The bread stays crisp instead of collapsing
- The cheese melts evenly without overpowering
- Every bite has texture, not just softness
And maybe this is subjective, but when it’s done right, it feels like something you’d order at a really good diner and immediately try to recreate at home.
Best Bread for Tuna Melt: Why Sourdough Wins
Bread might seem like a small detail in a tuna melt recipe, but it quietly decides everything. Texture, structure, even flavor.
Sourdough, in particular, tends to outperform most options. It has a firm structure that holds up against the tuna mixture without collapsing, and that slight tang cuts through the richness in a way that just works.
Thick-cut white bread is a close second, especially if you’re after that classic diner feel. Brioche? It’s good, but sometimes a bit too soft and slightly sweet for this kind of sandwich.
If you’ve ever ended up with a tuna melt that felt… limp, it was probably the bread. Not the filling.
So yeah, choosing the right bread isn’t optional. It’s foundational.
Ingredients for the Perfect Tuna Melt Recipe
You don’t need anything complicated here. But the exact choices? They matter more than you’d expect.
Core Ingredients
- Canned tuna (in water, drained well)
- Mayonnaise
- Dijon mustard
- Celery (finely chopped)
- Red onion (optional, but recommended)
- Lemon juice
- Salt and pepper
- Bread (sourdough or thick white bread works best)
- Butter
- Cheese (cheddar, Swiss, or a mix)
Optional Flavor Boosters
- Pickles or relish for tang
- Fresh herbs like parsley or dill
- A pinch of paprika
- A few drops of hot sauce

Ingredient Insight
If you’re wondering why your tuna melt recipe never quite hits, it’s often because the tuna mixture is either too wet or too bland. Draining properly and adding acidity changes everything.
How to Make a Tuna Melt (Step-by-Step)
This is where precision quietly makes a difference.
Step 1: Prepare the Tuna Mixture
In a bowl, combine:
- Drained tuna
- 2 to 3 tablespoons mayonnaise
- 1 teaspoon Dijon mustard
- A squeeze of lemon juice
- Chopped celery and onion
- Salt and pepper
Mix gently. Not aggressively. You want texture, not paste.
Step 2: Assemble the Sandwich
- Butter one side of each bread slice
- Place tuna mixture on the unbuttered side
- Add cheese on top
- Close the sandwich with buttered sides facing outward
Step 3: Cook It Properly
Heat a pan over medium-low heat.
This part matters more than you think.
- Place the sandwich in the pan
- Cook slowly until golden brown
- Flip and repeat
If the heat is too high, the bread burns before the cheese melts. Too low, and everything turns soft.
Step 4: Let It Rest (Yes, Really)
Give it a minute before cutting. It helps everything settle instead of spilling out immediately.
See how to make this recipe in the video below.
How do you know when a tuna melt is done?
When the bread is evenly golden and crisp, and the cheese is fully melted inside. If you press lightly and hear a faint crunch, you’re there.
How to Keep Your Tuna Melt Crispy (Not Soggy)
This might be the most important part of any tuna melt recipe.
Key Techniques
- Drain tuna thoroughly
- Use thick, sturdy bread
- Avoid too much mayo
- Cook on medium-low heat
Small Adjustment, Big Impact
Here’s something people rarely mention. Spread a very thin layer of butter, not a thick one. Too much butter can actually soften the bread instead of crisping it.
And if you’ve ever wondered why diner tuna melts taste better… it’s usually because they control heat better, not because they use special ingredients.
Moisture Control: The Key to a Non-Soggy Sandwich
This is the part most people underestimate.
Moisture is the main reason a tuna melt recipe fails. Not the cheese. Not the heat. The moisture.
If the tuna isn’t drained properly, or if there’s too much mayo, that liquid seeps into the bread while cooking. And once that happens, there’s no saving it.
A few simple fixes make a huge difference:
- Press and drain tuna thoroughly before mixing
- Use just enough mayo to bind, not drown
- Add a touch of acidity like lemon juice instead of extra mayo
- Avoid assembling too early before cooking
It sounds simple, and it is. But skipping this step is usually the exact moment things go wrong.
Best Cheese for Tuna Melt (And Why It Matters)
You can use almost any cheese, but not all will give you the same result.
Top Choices
- Cheddar: sharp, bold, classic
- Swiss: mild, melts smoothly
- American: ultra-melty, very creamy
What Actually Works Best
A mix of cheddar and Swiss tends to give the best balance. Flavor from cheddar, melt from Swiss.
But honestly, this comes down to preference. Some people swear by American cheese. Others avoid it completely. There’s no single “correct” answer here.
Can you use mozzarella?
You can, but it’s not ideal. It melts well but lacks the flavor needed to balance the tuna.
Variations You’ll Actually Want to Try
Once you get the base right, you can adjust it depending on your mood.
Popular Variations
- Spicy tuna melt with jalapeños or hot sauce
- Open-faced tuna melt for a lighter option
- Avocado tuna melt for extra creaminess
- Low-carb version using lettuce wraps
Real Talk
Some variations sound good but don’t actually work that well. Overloading the sandwich usually ruins the texture. Keep it balanced.
Common Tuna Melt Mistakes (And Fixes)
If something feels off, it’s usually one of these.
Mistakes to Watch For
- Too much mayo
- Not draining tuna
- Cooking on high heat
- Using thin bread
Quick Fixes
- Add lemon juice to cut heaviness
- Reduce mayo slightly
- Lower the heat and cook slower
- Switch to thicker bread
Why is my tuna melt falling apart?
Most likely too much moisture or overfilling. Try using less filling and pressing lightly while cooking.
Why You’ll Love This Tuna Melt Recipe
- Quick and easy to make, even on busy days
- Uses simple ingredients you probably already have
- Perfect for lunch, dinner, or even a late-night craving
- Delivers a crispy outside and creamy inside every time
- Feels comforting but still satisfying enough to serve guests
There’s something quietly satisfying about getting this right. It’s not just food. It’s that moment when something simple turns out better than expected.
Serving and Storage Tips for Tuna Melt Recipe
Serving Suggestions
- Slice diagonally for a classic presentation
- Serve with tomato soup or a light salad
- Add pickles on the side for contrast
Storage
- Store leftover tuna mixture in an airtight container for up to 2 days
- Avoid storing assembled sandwiches, they get soggy
Reheating
- Reheat in a pan, not a microwave
- Use low heat to bring back crispiness
Helpful Notes
- Always taste the tuna mixture before assembling
- Adjust acidity with lemon juice if needed
- Let the sandwich rest briefly after cooking
- Don’t rush the cooking process
Perfect Crispy Tuna Melt
Ingredients
Tuna Mixture
- 1 can tuna in water, drained
- 3 tbsp mayonnaise
- 1 tsp Dijon mustard
- 1 tbsp lemon juice fresh
- 2 tbsp celery finely chopped
- 2 tbsp red onion finely chopped
- 1 pinch salt
- 1 pinch black pepper
Sandwich Assembly
- 4 slices sourdough bread
- 2 tbsp butter softened
- 4 slices cheddar or Swiss cheese
Instructions
- In a bowl, combine drained tuna, mayonnaise, Dijon mustard, lemon juice, celery, red onion, salt, and pepper. Mix gently to keep some texture.
- Butter one side of each bread slice. Place bread butter-side down, then add the tuna mixture evenly.
- Top the tuna with cheese slices, then close the sandwich with another slice of bread, butter-side facing outward.
- Heat a skillet over medium-low heat. Place the sandwich in the pan and cook slowly until golden brown and crispy.
- Flip carefully and cook the other side until the cheese is fully melted and the bread is crisp.
- Remove from heat and let the sandwich rest for 1 minute before slicing and serving.
Notes
Frequently Asked Questions (FAQ) for Tuna Melt Recipe
Can I make a tuna melt in the oven?
Yes, but it won’t be as crispy as pan-cooked. Use high heat and watch closely.
Can I use tuna in oil?
You can, but drain it well and reduce mayo slightly
What bread works best?
Sourdough or thick white bread holds up best.
Can I make it healthier?
Use Greek yogurt instead of mayo and whole grain bread.
Can you make a tuna melt without mayonnaise?
Yes, you can substitute mayonnaise with Greek yogurt, mashed avocado, or even cream cheese. Each option changes the flavor slightly, but still keeps the tuna melt creamy. Greek yogurt gives a lighter, tangier taste, while avocado adds richness.
What is the best bread for a tuna melt recipe?
Thick, sturdy bread works best. Sourdough, brioche, or artisan white bread hold up well and stay crispy. Thin sandwich bread tends to get soggy and fall apart, especially with warm tuna filling.
Can you prepare tuna melt ahead of time?
You can prepare the tuna mixture ahead and store it in the fridge for up to 2 days. However, it’s best to assemble and cook the sandwich fresh to maintain the crispy texture.
How do you make a tuna melt without a stovetop?
If you don’t have a stovetop, you can use an oven or air fryer. Bake at 200°C (400°F) until the bread is golden and the cheese melts. An air fryer gives a surprisingly crispy result, closer to pan-cooked.
What goes well with a tuna melt?
Tuna melts pair well with simple sides like:
Tomato soup
Coleslaw
Potato chips or fries
Green salad
Pickles for acidity
Nutrition
Approximate per serving:
- Calories: 450 to 550
- Protein: 25 to 30g
- Carbohydrates: 30 to 40g
- Fat: 20 to 30g
Conclusion
A good tuna melt recipe isn’t complicated, but it is precise. Once you understand what actually matters, the difference becomes obvious. Crisp bread, balanced filling, properly melted cheese. It all adds up.
And maybe the best part? After you make it once and get it right, you probably won’t go back to guessing again.
If you enjoyed this Tuna Melt Recipe, you will love my [Cannellini Bean Salad and Gochujang Noodles] recipe too
For more delicious and easy recipes, follow me on Facebook and Pinterest
If you enjoyed this recipe, feel free to leave a comment below or follow me on my culinary journey!

This recipe was written and tested by Rasha, the founder of Recipesedeas. Rasha is a food enthusiast living in the USA, sharing her family-inspired recipes and culinary adventures
