
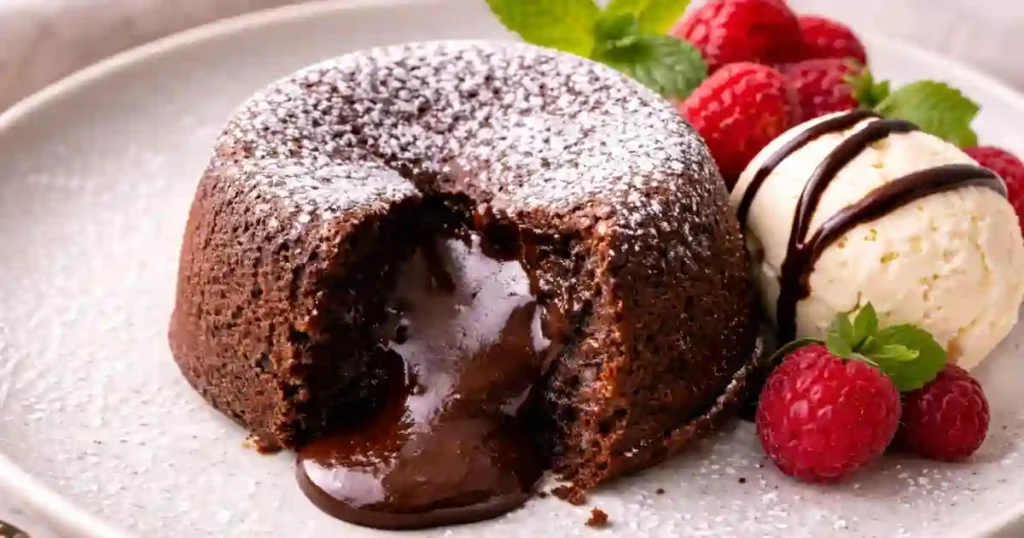
Let’s be honest. The phrase molten chocolate cake recipe sounds simple until you’re standing in your kitchen wondering if you just baked a chocolate muffin instead of that dreamy, lava-filled dessert you had in mind. This dessert sits right on the edge between perfect and disappointing. A minute too long in the oven and the center is gone; a minute too short and it collapses into something questionable.
Yet, when it works, it really works. That moment when you cut into the cake and warm chocolate slowly spills out feels wonderfully dramatic. This guide is built for that exact moment helping you get a perfect lava cake consistently by mastering timing, visual cues, and a few small tricks that make a massive difference. Whether you’re baking for guests, a date night, or simply craving something indulgent, you are in the right place.
Molten Chocolate Cake

Ingredients
Cake Batter
- 100 g dark chocolate 60–70% cocoa
- 100 g unsalted butter
- 2 large eggs
- 2 egg yolks
- 100 g sugar
- 40 g all-purpose flour
- 1 pinch salt
For Ramekins
- 1 tablespoon butter for greasing
- 1 tablespoon cocoa powder for dusting
Instructions
- Preheat the oven to 220°C. Butter the ramekins thoroughly and dust with cocoa powder, tapping out any excess.
- Melt the dark chocolate and butter together in a heatproof bowl over simmering water or in short microwave bursts until smooth.
- In a separate bowl, whisk the eggs, egg yolks, and sugar until slightly thickened and pale.
- Slowly pour the melted chocolate mixture into the egg mixture, whisking continuously.
- Gently fold in the flour and salt until just combined. Do not overmix.
- Divide the batter evenly between the prepared ramekins.
- Bake for 8–10 minutes until the edges are set but the center remains soft and slightly glossy.
- Let the cakes rest for 1 minute, then carefully invert onto plates and serve immediately.
Notes
Table of Contents
Table of Contents
Why You’ll Love This Recipe & The Science of Lava
Quick and Easy: Ready in under 20 minutes from start to finish using everyday baking staples.
Perfect Gooey Center: Delivers a reliable, liquid core without requiring advanced culinary techniques.
Restaurant Quality: Offers an elegant, impressive presentation without the added stress or guesswork.
Prep-Ahead Friendly: The batter can be made in advance, making it perfect for dinner parties or last-minute cravings.
How It Works
A molten chocolate cake works because the outside bakes faster than the center. By utilizing a high baking temperature and precisely controlled underbaking, the outer edges set firmly to hold the structure while the middle remains soft, warm, and fluid.
Quick answer for impatient readers
A molten chocolate cake works because the outside bakes faster than the center. By slightly underbaking the cake, the middle stays soft and fluid while the edges hold structure.
That’s it in theory. In practice… it’s a little more nuanced. We’ll get into that.
Ingredients and Preparations for Molten Chocolate Cake
Every ingredient in this recipe pulls more weight than you might think. Skimping on quality or guessing measurements can quickly change how the cake structure behaves in the oven.
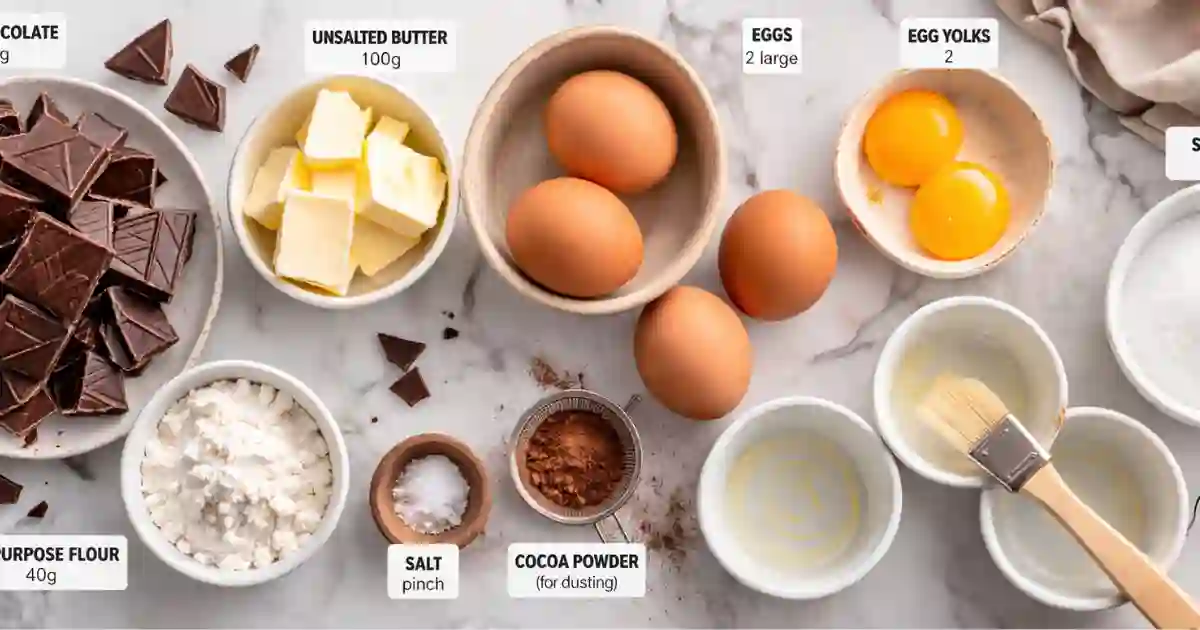
Molten Chocolate Cake Ingredients Table
| Core Batter Ingredients | Ramekin Prep (The Secret Step) | Optional Flavor Upgrades |
| • 100g High-quality dark chocolate (60-70%) • 100g Unsalted butter • 2 Large eggs • 2 Egg yolks • 100g Granulated sugar • 40g All-purpose flour • A pinch of salt | • Softened butter (for greasing) • Cocoa powder (for dusting) | • 1 tsp Espresso powder (deepens chocolate) • A pinch of chili powder (subtle heat) • 1 tbsp Peanut butter (swirled in center) • 1 square of solid chocolate (extra lava) |
BAKING ESSENTIAL: For even heat distribution and clean presentation, use a set of standard 6 oz heat-safe Porcelain Ramekins / Souffle Dishes!
How to Make Molten Chocolate Cake Step-by-Step
Before starting the process, you can watch a quick visual demonstration of the perfect batter consistency and assembly:
See how to make this Molten Chocolate Cake recipe in the video below.
Step-by-Step Instructions
Preheat and Prep: Preheat your oven to 220°C (425°F). Prepare your baking ramekins by coating them thoroughly with softened butter and a light dusting of cocoa powder. Tap out any excess coating.
Melt Chocolate & Butter: Combine the dark chocolate and unsalted butter in a heatproof bowl. Melt them together gently over a double boiler or in short bursts in the microwave, stirring until completely smooth.
KITCHEN MUST-HAVE: Easily melt your chocolate over a water bath or in the microwave using Pyrex Glass Heat Resistant Mixing Bowls.
Whisk Eggs & Sugar: In a separate medium bowl, vigorously whisk the 2 whole eggs, 2 egg yolks, and granulated sugar together until the mixture thickens slightly and pales in color. The extra yolks are crucial they provide the extra richness that keeps the center soft.
Combine and Fold: Slowly pour the melted chocolate mixture into the whisked eggs, stirring continuously. Gently fold in the all-purpose flour and a pinch of salt using a spatula. Mix only until just incorporated; overmixing develops excess gluten and turns the dessert bready.
Bake: Pour the batter evenly into your prepared ramekins. Place them on a baking sheet and bake at 220°C for 8 to 10 minutes.
PRESENTATION PRO TIP: Give your cakes that professional restaurant finish with a quick dusting of powdered sugar using a Stainless Steel Fine Mesh Powder Shaker Sifter Stainless Steel Fine Mesh Powder Shaker Sifter.
Rest and Serve: Remove from the oven and let the cakes sit undisturbed inside the ramekins for exactly one minute. This brief rest helps the outer crust stabilize. Place an inverted plate over the top of the ramekin, carefully flip it over, and lift the ramekin to reveal the cake.
That’s the mechanical part. Now comes the part most recipes barely explain.
What you should actually look for
When baking a molten chocolate cake, time alone is not fully reliable. Ovens vary, and ramekin thickness matters. Look for these visual cues:
- Firm Edges: The outer rims should look firm and slightly pulled away from the ramekin walls.
- Soft Top: The center surface should look set, but slightly soft or glossy.
- Subtle Rise: A subtle rise, but not fully domed like a cupcake.
The Secret to a Perfect Molten Center
The entire recipe comes down to controlled underbaking:
The inner core must stay fluid to create the flowing lava effect.
The outer layer must be fully set to hold the cake together.
Baking Time & Visual Doneness Checklist
| Ramekin Size | Approximate Bake Time |
| Small Ramekins | 7 to 9 minutes |
| Standard Ramekins | 8 to 10 minutes |
| Larger Portions | 10 to 12 minutes |
Pro-Tip: If baking for an important event or date night, bake a single “test cake” first to calibrate your specific oven timing!
Make Ahead, Storage, and Reheating
Making Ahead: Prepare the batter and fill ramekins up to 24 hours in advance. Cover tightly with plastic wrap and refrigerate. When ready to serve, bake directly from the fridge, adding roughly 1 minute to the total baking time.
Freezing: Filled, unbaked ramekins can be frozen solid for up to 3 months. Bake directly from frozen by adding 2 to 3 minutes to standard baking time.
Reheating Reality: Once a lava cake is fully baked, reheating will warm it through but will not restore the fluid liquid center. It will retain a soft, fudgy texture instead.
Common Mistakes and Quick Fixes
No Running Center (Overbaked): Next time, reduce your baking duration by 1 to 2 minutes. Always trust the visual jiggle over the timer. Do not use a toothpick to check for doneness, as it will always come out wet from the liquid core.
Cake Collapsed or Broke Apart: The cake was either drastically underbaked or flipped too quickly without giving it a 1-minute rest to build structure.
The Flavor Tastes Flat: This is a result of low-quality or overly sugary chocolate. Stick to premium dark chocolate containing 60% to 70% cocoa solids for the best depth.
Serving Suggestions
Dust lightly with powdered sugar through a fine sieve.
Add a scoop of cold vanilla bean ice cream for temperature contrast.
Garnish with fresh raspberries or strawberries for bright acidity.
Helpful Notes
There are always a few things that don’t quite fit neatly into instructions but still make a difference.
- Slightly underbaking is usually better than overbaking if you want a true molten center
- Letting the batter sit for a few minutes before baking can improve texture
- If your cakes stick, it’s almost always due to insufficient greasing
- High-quality chocolate makes a noticeable difference in flavor depth
- If you’re unsure about timing, test one cake first before baking the entire batch
Also, if your first attempt isn’t perfect, that’s normal. This recipe has a small learning curve, mostly around timing. Once you dial that in, it becomes surprisingly consistent.
Nutrition Information & Estimates
The values provided below are approximate estimates per individual serving ramekin:
- Calories: 395 kcal
- Total Fat: 20 g
- Saturated Fat: 11 g
- Total Carbohydrates: 35 g
- Sugars: 28 g
- Protein: 6 g
- Sodium: 90 mg
Frequently Asked Questions About Molten Chocolate Cake
Can I make molten chocolate cake without ramekins?
Yes, but results vary. Muffin tins or small cups can work, though baking time will change slightly.
Why is my center not runny?
Most likely overbaking. Even small timing differences matter.
Can I microwave molten chocolate cake?
You can, but texture differs. It becomes softer and less structured, with a less defined molten center.
Is molten chocolate cake actually hard to make?
Not really. It’s simple in terms of ingredients and steps, but timing is everything. Once you understand the visual cues and your oven behavior, it becomes surprisingly reliable.
Can I use milk chocolate instead of dark chocolate?
You can, but the result will be noticeably sweeter and less intense. The texture may still work, but the overall depth of flavor will drop. If you prefer a milder taste, it’s fine. Just know it changes the experience.
Can I bake these in a regular muffin tray?
Yes, but results vary slightly. Muffin trays are thinner and conduct heat differently, so baking time may be shorter. Keep a closer eye on them and expect a slightly less dramatic molten center.
Why didn’t my cake have a molten center?
Most likely it was overbaked. Even an extra minute can fully cook the center. It can also happen if too much flour was added or the oven temperature was lower than expected.
Can I check doneness with a toothpick?
Not really. A toothpick will come out with melted chocolate even when the cake is perfect. It’s not a reliable method for this recipe.
Should I flip the cake or serve it in the ramekin?
Both work. Flipping creates a cleaner presentation, but serving in the ramekin is easier and removes the risk of breaking the cake.
Can I make this recipe gluten-free?
Yes. You can substitute the flour with a gluten-free blend or almond flour. The texture may vary slightly, but the molten center can still work.
Can I reheat and still get a molten center?
Not really. The molten texture depends on the initial bake. Reheating warms it, but does not recreate the liquid center.
Why did my cake collapse?
It was likely too underbaked or flipped too quickly. Letting it rest for a minute helps it hold structure.
Conclusion
At some point, making a molten chocolate cake recipe stops feeling like a risk and starts feeling predictable. Not perfectly controlled, maybe, but familiar enough that you trust your instincts.
You begin to notice the small signals. The slight jiggle. The edges pulling away. The moment when taking it out feels a little early, but you do it anyway.
And that’s usually when it works best.
If you’ve ever been disappointed by a cake that didn’t quite melt the way you expected, you’re not alone. It happens. But once you understand the timing and the visual cues, it becomes something you can rely on.
And when it works, it really does feel worth it.
If you enjoyed this Molten Chocolate Cake, you will love my another recipes too
. Crab and Shrimp Stuffed Salmon with Lemon Butter Sauce
. Homemade Hamburger Buns Recipe
. The Best Cherry Delight Recipe
. Roasted Whole Chicken: The Ultimate Guide to Perfect Results
For more delicious and easy recipes, follow me on Facebook and Pinterest
If you enjoyed this recipe, feel free to leave a comment below or follow me on my culinary journey!
This recipe was written and tested by Rasha, the founder of Recipesedeas. Rasha is a food enthusiast living in the USA, sharing her family-inspired recipes and culinary adventures