

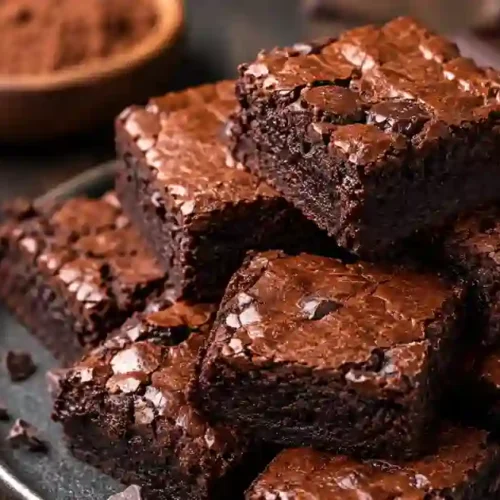
Rich, fudgy, deeply chocolatey, and honestly kind of dangerous to keep in the kitchen. These flourless double chocolate brownies deliver that crackly top and melt in your mouth center everyone secretly hopes for when baking brownies from scratch. The best part? You do not need flour, fancy gluten free blends, black beans, or strange “healthy dessert” swaps that somehow taste like disappointment.
These brownies are intensely chocolate-forward with a soft center that stays fudgy for days. They feel somewhere between a bakery brownie and a flourless chocolate cake, which is probably why people keep sneaking “just one more square” every time they walk past the pan. Been there. More than once.
If you have ever struggled with dry brownies, cakey texture, or recipes that overpromise and underdeliver, this one fixes all of that. The balance of melted chocolate, cocoa powder, and just enough starch creates brownies that are dense without becoming heavy.
Perfect for gluten free guests, chocolate lovers, holiday trays, late-night cravings, or honestly just a random Tuesday when life feels annoying and brownies sound like therapy.
Flourless Double Chocolate Brownies
Equipment
- 8×8 baking pan
- Parchment Paper
- Large mixing bowl
- Whisk
- Rubber spatula
- Small saucepan
- Measuring cups and spoons
Ingredients
Brownie Batter
- 6 tablespoons coconut oil or unsalted butter
- 6 ounces semi sweet chocolate chips
- 2 large eggs room temperature
- 2/3 cup coconut sugar or granulated sugar
- 2 teaspoons vanilla extract
- 1/4 cup unsweetened cocoa powder
- 3 tablespoons arrowroot powder or cornstarch
- 1/4 teaspoon salt
- 1/3 cup chocolate chips for extra texture
Optional Add Ins
- 1/3 cup chopped walnuts optional
- 1 teaspoon espresso powder optional
- 1 tablespoon sea salt flakes optional topping
Instructions
- Preheat the oven to 350°F (175°C). Line an 8×8 baking pan with parchment paper, leaving overhang on the sides for easy removal.
- In a small saucepan over low heat, melt the coconut oil and semi sweet chocolate chips together. Stir until smooth and glossy, then remove from the heat and let cool slightly.
- In a large mixing bowl, whisk together the eggs, sugar, and vanilla extract until smooth and slightly lighter in color.
- Slowly pour the melted chocolate mixture into the egg mixture while whisking until fully combined.
- Add the cocoa powder, arrowroot powder, and salt. Fold gently until no dry streaks remain.
- Stir in the extra chocolate chips and any optional add-ins like walnuts or espresso powder.
- Spread the batter evenly into the prepared pan and smooth the top with a spatula.
- Bake for 25 to 30 minutes until the edges are set but the center still looks slightly soft.
- Allow the brownies to cool before slicing for cleaner cuts, or enjoy slightly warm for extra gooey texture.
Notes
Table of Contents
Table of Contents
Why You’ll Love This Flourless Double Chocolate Brownies Recipe
• Super fudgy texture with shiny crackly tops
• Naturally gluten free without specialty flour blends
• Made with simple pantry ingredients
• Rich double chocolate flavor in every bite
• Easy one bowl brownie recipe with minimal cleanup
• Perfect for holidays, birthdays, bake sales, or cozy weekends
• Stays moist and chewy for several days
• Tastes like a bakery style brownie without complicated steps
What really makes these flourless double chocolate brownies stand out is the texture. A lot of flourless brownie recipes lean too far into “healthy dessert” territory and end up tasting oddly dense or gummy. These do not. They taste unapologetically indulgent.
The melted chocolate creates richness while the cocoa powder deepens the flavor so the brownies taste layered instead of overly sweet. And honestly? The lack of flour somehow makes the chocolate flavor even more intense.
There is also something weirdly satisfying about serving these to people without mentioning they are flourless until afterward. Watching the confusion happen is half the fun.
Recipe Card
Flourless Double Chocolate Brownies
Prep Time: 10 minutes
Cook Time: 28 minutes
Total Time: 38 minutes
Yield: 16 brownies
Cuisine: American
Category: Dessert
Diet: Gluten Free
Calories: Approximately 210 per brownie
The Science of the Shiny Crackly Top: Sugar and Eggs
You know that thin, delicate, paper-like layer on top of really good brownies? The one that cracks slightly when you slice into it and somehow makes the brownies feel instantly bakery quality? Yeah, that shiny crackly top is not luck. It is chemistry. Delicious chemistry, but still chemistry.
The magic mostly comes from how the sugar and eggs interact during mixing and baking. When you whisk eggs with sugar thoroughly, the sugar begins dissolving into the moisture of the eggs. As the brownies bake, that sugary mixture rises to the surface and forms a fragile meringue-like layer. That is what creates the glossy top people obsess over in brownie recipes.
Melted chocolate also plays a surprisingly important role here. The fat from the chocolate helps suspend the sugar and proteins from the eggs, creating that signature sheen while keeping the center dense and fudgy underneath.
Honestly, this is why skipping steps or rushing the whisking process can completely change your results. Some people assume brownie batter should be mixed quickly and aggressively like a basic boxed mix. Not quite. Giving the eggs and sugar enough time to combine properly creates that professional-looking finish.
A few things that help create shiny brownie tops:
• Whisk eggs and sugar until smooth and slightly lighter in color
• Use real melted chocolate instead of cocoa powder alone
• Avoid reducing the sugar too much
• Bake at the correct temperature
• Do not overmix once dry ingredients are added
And weirdly enough, even humidity can affect brownie tops sometimes. Baking is frustrating like that. One day your brownies look flawless, the next day they look rustic and chaotic for absolutely no emotional reason.
Still taste amazing though.
Ingredients Needed for Flourless Double Chocolate Brownies
• 6 tablespoons coconut oil or unsalted butter
• 6 ounces semi sweet chocolate chips
• 2 large eggs at room temperature
• 2/3 cup coconut sugar or granulated sugar
• 2 teaspoons vanilla extract
• 1/4 cup unsweetened cocoa powder
• 3 tablespoons arrowroot powder or cornstarch
The Role of Arrowroot: Structure Without Gluten
Flourless brownies sound simple until you realize flour normally does a lot of heavy lifting in baking. It provides structure, stability, and texture. Without it, brownies can easily collapse into a greasy chocolate puddle or turn oddly dense and rubbery.
That is where arrowroot powder quietly saves the day.
Arrowroot acts as a gentle binder that helps hold the brownies together without making them cakey. Unlike traditional flour, it does not introduce heaviness or dryness. Instead, it keeps the texture soft, chewy, and smooth while allowing the chocolate flavor to stay front and center.
Some people use cornstarch instead, which works fine. But arrowroot tends to create a silkier texture with slightly cleaner flavor. The difference is subtle, honestly, but noticeable if you bake often enough.
Another advantage? Arrowroot blends beautifully into gluten free desserts without leaving the grainy texture that some flour alternatives create. You know that disappointing sandy texture some gluten free brownies have? This avoids that problem entirely.
Here is what arrowroot powder does in these brownies:
• Helps bind ingredients together
• Creates chewy texture without flour
• Prevents brownies from becoming overly greasy
• Supports soft centers and clean slices
• Keeps the chocolate flavor intense and uncluttered
There is also something kind of satisfying about using a simple ingredient to solve a complicated texture problem. Baking can feel unnecessarily dramatic sometimes, especially with gluten free desserts. One tiny measurement off and suddenly your brownies resemble chocolate survival bars.
Arrowroot helps keep things balanced. Soft but stable. Rich but not heavy. Fudgy without falling apart.
Which, honestly, is exactly what most people want from a really good brownie anyway.
• 1/4 teaspoon salt
• 1/3 cup chocolate chips for extra texture
Optional Add Ins
• Chopped walnuts
• Dark chocolate chunks
• Espresso powder
• Sea salt flakes
• Dried cherries or raspberries

How to Make Flourless Double Chocolate Brownies
| Component | Ingredient | Technical Role | Pro Tip |
| Fat Base | Coconut Oil / Butter | Provides moisture and “fudginess” | Use room temperature eggs to prevent the fat from seizing. |
| Flavor Core | Semi-Sweet Chocolate | Builds the rich, melted center | Choose a chocolate bar with at least 60% cocoa for depth. |
| Stabilizer | Arrowroot / Cornstarch | Replaces flour for structure | Sift with the cocoa powder to ensure a lump-free batter. |
| Texture | Extra Chocolate Chips | Adds “pockets” of melted joy | Fold them in last to keep them from sinking to the bottom. |
Step 1: Prepare the Pan
Preheat your oven to 350°F. Line an 8×8 baking pan with parchment paper, leaving a little overhang on the sides for easy lifting later. Trust me, future you will appreciate this when cutting clean brownie squares instead of excavating them with a spoon.
Step 2: Melt the Chocolate
In a small saucepan over low heat, melt the coconut oil and chocolate chips together. Stir slowly until smooth and glossy. Remove from the heat and let it cool slightly.
Do not rush this part. If the mixture is too hot when added to the eggs, you risk scrambling them. Nobody wants chocolate scrambled eggs pretending to be dessert.
Step 3: Whisk the Wet Ingredients
In a large bowl, whisk the eggs, sugar, and vanilla until smooth and slightly lighter in color. This helps create that beautiful shiny brownie top everyone obsesses over online.
Pour in the melted chocolate mixture and stir until fully combined.
Step 4: Add the Dry Ingredients
Add cocoa powder, arrowroot powder, and salt. Fold gently until no dry streaks remain. Stir in the extra chocolate chips.
The batter will look thick, glossy, and ridiculously tempting at this point. Technically you should not eat raw batter with eggs in it. Realistically? You are probably going to taste it anyway.
Step 5: Bake
Spread the batter evenly into the prepared pan.
Bake for 25 to 30 minutes until the edges are set but the center still looks slightly soft. This is the secret to fudgy brownies. Overbaking is the fastest route to sadness.
Let the brownies cool completely before slicing. Actually, scratch that. Let them cool mostly before slicing if you enjoy warm gooey brownies with melted chocolate pockets.
See how to make this Flourless Double Chocolate Brownies recipe in the video below
Tips for Perfect Double Chocolate Brownies
Do Not Overbake
This matters more than almost anything else. Flourless brownies continue to set as they cool. Pull them out when the center still has a slight wobble.
Use Good Chocolate
Since chocolate is the main flavor here, quality matters. Cheap chocolate can taste waxy or flat. A decent semi sweet or dark chocolate makes a huge difference.
Room Temperature Eggs Matter
Cold eggs can cause the melted chocolate to seize slightly, creating uneven batter texture. Small detail. Big difference.
Chill for Extra Fudgy Texture
These brownies become even denser and richer after a few hours in the fridge. Some people genuinely prefer them cold straight from the refrigerator.
Honestly? I might be one of those people.
If you love the intensity of these flourless chocolate brownies, you might also enjoy our [Authentic Moroccan Beef Tagine] for a savory-sweet balance, or for another quick protein-packed snack, try the [Dill Pickle Chicken Salad]. Every great dessert deserves a great meal before it!
Serving and Storage Tips for Flourless Double Chocolate Brownies
Serve these flourless double chocolate brownies slightly warm with:
• Vanilla ice cream
• Fresh berries
• Whipped cream
• Espresso or coffee
• A dusting of cocoa powder
• Melted chocolate drizzle
For cleaner slices, refrigerate the brownies for 1 hour before cutting.
Storage
• Store at room temperature in an airtight container for up to 4 days
• Refrigerate for up to 1 week for extra fudgy texture
• Freeze individual brownie squares for up to 3 months
Reheating Tips
• Microwave for 10 to 15 seconds for warm gooey brownies
• Let frozen brownies thaw overnight in the refrigerator
• Add a scoop of ice cream after reheating for restaurant style dessert vibes
Helpful Notes
• Coconut oil gives a subtle richness without overpowering the chocolate
• Arrowroot powder keeps the brownies soft and chewy
• Adding espresso powder deepens chocolate flavor without tasting like coffee
• Sea salt on top balances sweetness beautifully
• For ultra gooey brownies, slightly underbake them
• For cleaner slices, use a warm knife and wipe between cuts
One thing people rarely mention with flourless brownies is how dramatically texture changes after cooling. Warm brownies feel softer and almost molten. Chilled brownies become dense, truffle-like, and intensely chocolatey.
Neither version is wrong. It just depends on what kind of brownie mood you are in.
Frequently Asked Questions for Flourless Double Chocolate Brownies
Are flourless brownies gluten free?
Yes. Since these brownies do not contain wheat flour, they are naturally gluten free. Just double check that your chocolate chips and cocoa powder are certified gluten free if needed.
Why are my brownies too dry?
Most likely overbaking. Flourless brownies should come out while the center still looks slightly underdone.
Can I use butter instead of coconut oil?
Absolutely. Butter creates a richer, slightly more classic brownie flavor.
Can I freeze flourless brownies?
Yes. Wrap individual brownies tightly and freeze for up to 3 months.
What makes brownies fudgy instead of cakey?
Higher fat content and less flour create fudgy brownies. Since this recipe skips flour entirely, the texture stays dense and rich.
Can I make these flourless double chocolate brownies dairy free?
Yes, absolutely. Simply use dairy free chocolate chips and replace butter with coconut oil. The brownies still turn out rich, fudgy, and intensely chocolatey. Honestly, most people will not even notice they are dairy free unless you tell them.
Why did my brownies sink in the middle?
A slight sink is completely normal for flourless brownies because they have such a dense and fudgy texture. However, dramatic sinking can happen if the batter was overmixed or the brownies were underbaked in the center.
Can I make these brownies ahead of time?
Yes, and they actually taste even better the next day. The chocolate flavor deepens overnight, and the texture becomes more chewy and truffle-like after chilling. This makes them perfect for parties, holidays, or meal prep desserts.
What is the best chocolate to use for homemade brownies?
Semi sweet or dark chocolate with good cocoa content works best. Cheap chocolate can taste overly sweet or waxy, while high-quality chocolate gives the brownies a smoother texture and deeper flavor.
Can I add nuts or other mix-ins to this recipe?
Definitely. Chopped walnuts, pecans, dark chocolate chunks, peanut butter chips, or even dried cherries work beautifully in these brownies. Just avoid adding too many extras or the brownies can lose their soft fudgy center.
Nutrition Information
Estimated per brownie:
• Calories: 210
• Carbohydrates: 20g
• Protein: 3g
• Fat: 14g
• Saturated Fat: 8g
• Sugar: 15g
• Fiber: 2g
• Sodium: 70mg
Nutrition values are approximate and can vary depending on ingredient brands and substitutions.
Conclusion
These flourless double chocolate brownies are one of those desserts that somehow feel both simple and impressive at the same time. They are deeply chocolatey, ridiculously fudgy, and surprisingly easy to make with basic ingredients.
And maybe this sounds dramatic for brownies, but there is something comforting about recipes like this. The kind you make once for “testing purposes” and suddenly find yourself craving every single week afterward.
If you love rich chocolate desserts with bakery style texture and zero complicated steps, this recipe deserves a permanent spot in your kitchen rotation.
Just do yourself a favor and hide a few brownies before everyone else discovers them. Trust me on that.
For more delicious and easy recipes, follow me on Facebook and Pinterest
If you enjoyed this recipe, feel free to leave a comment below or follow me on my culinary journey!

This recipe was written and tested by Rasha, the founder of Recipesedeas. Rasha is a food enthusiast living in the USA, sharing her family-inspired recipes and culinary adventures
