

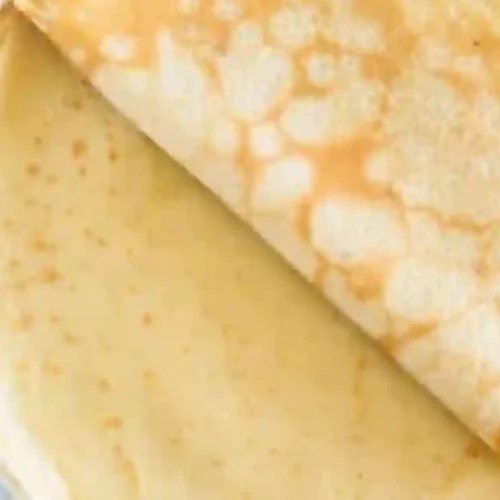
A good crepe recipe should feel simple from the very first step. If you want thin, flexible crepes that work for sweet mornings or savory dinners, you’re in the right place. You only need basic pantry items and a regular pan. No gadgets. No fuss. Just smooth batter, quick cooking, and plenty of room to play with flavors. I’ve made these countless times in my own kitchen, and they stay reliable every single round. Whether you fill them with fruit, cheese, chocolate, or herbs, these crepes give you an easy way to make something that feels special without extra work.
Simple Classic Crepes Recipe
Ingredients
Crepe Batter
- 2 large eggs room temperature
- 1/2 cup milk add a splash more if needed
- 1/2 cup water
- 1/4 teaspoon salt
- 1 cup all-purpose flour
- 2 tablespoons butter melted and slightly cooled
Instructions
- In a large bowl, whisk together the eggs, milk, water, and salt until fully combined.
- Add the flour gradually, whisking gently to avoid lumps. Pour in the melted butter and whisk until the batter is smooth and pourable.
- Let the batter rest for at least 20 minutes to allow the gluten to relax and improve texture.
- Heat a nonstick skillet over medium heat and lightly grease with butter.
- Pour about 1/4 cup of batter into the center of the pan and immediately tilt and swirl to spread it into a thin, even circle.
- Cook for 1–2 minutes until the edges lift and the bottom is lightly golden. Flip gently and cook the second side for about 1 minute.
- Transfer to a plate and repeat with remaining batter. Serve warm with your favorite fillings.
Notes
Table of Contents
Table of Contents
Why You’ll Love This Recipe
Here is what makes this crepe recipe stand out and why it becomes a go to for many home cooks:
- Quick and simple, perfect for busy mornings
- Works for sweet or savory fillings without any changes
- Uses basic pantry staples so no extra shopping trips
- No special pan required since a basic nonstick skillet works perfectly
- Batter blends into a smooth mix that cooks into tender, flexible crepes
- Ideal for gatherings because the crepes stack well and stay soft
- Gives a warm, comforting feel that impresses guests with minimal effort
This recipe also shines because the batter balance creates a thin texture without tearing. The flavor is mild enough for dessert fillings yet rich enough to pair with savory options. It is the kind of recipe that grows with your kitchen skills and never stops being useful.
Ingredients Needed
For the Batter
- 2 large eggs
- 1 half cup milk add a splash more if the batter needs loosening
- 1 half cup water
- 1 quarter teaspoon salt or adjust to taste
- 1 cup all purpose flour
- 2 tablespoons melted butter
_compressed")
These ingredients come together easily. Using room temperature eggs helps the batter blend smoothly. The mix of milk and water keeps the crepes light rather than heavy.
Crepes vs Pancakes The Definitive Difference And The Ingredient That Is Missing
Crepes and pancakes look related but behave very differently once they hit the pan. The biggest difference is the ingredient pancakes usually include and crepes never do: baking powder.
Here is a clear comparison chart
Texture
Crepes: Very thin with a flexible bite
Pancakes: Thick with a soft rise
Batter Thickness
Crepes: Runny and easy to swirl
Pancakes: Thicker and spoonable
Key Ingredient
Crepes: No leavening
Pancakes: Baking powder
Result in the Pan
Crepes: Stay flat and delicate
Pancakes: Puff up and form a fluffy center
Removing baking powder means crepes cook into smooth sheets that fold easily without breaking. This missing ingredient is exactly what gives crepes their classic look and feel.
Mastering Crepe Batter Technique Secrets for a Thin Tender Result
A smooth batter is the heart of any good crepe recipe. You want it thin enough to flow around the pan but strong enough to stay intact when flipped. My own kitchen experience taught me that two things matter most: steady whisking and the right liquid balance. Start with the wet ingredients, then bring the flour in slowly so it blends without forming lumps. The mix of milk and water gives the batter a light feel, and the melted butter adds flavor while helping prevent sticking. When the batter falls in a soft stream from the whisk, you know it is ready.
Why You Must Rest Crepe Batter The Science of Gluten Relaxation
Resting the batter is not optional. It transforms the texture.
Twenty minutes is the minimum and one hour is ideal.
Here is the simple reason: gluten tightens when mixed. If you cook the batter immediately, that tightness creates crepes that feel rubbery or stiff. Giving the batter time to rest lets the gluten relax. The flour also absorbs the liquid more evenly during this time, which leads to smoother spreading in the pan. The result is a soft, tender crepe that bends without tearing.
Whisk vs Blender Which Is Best for Your Crepe Batter
Both methods work, but each has strengths and drawbacks.
Whisk Method
Pros
- Gives you more control over texture
- Prevents overmixing
- Easy to clean
Cons
- Takes a little more effort
- Might leave tiny lumps if rushed
Blender Method
Pros
- Fast and convenient
- Breaks up lumps quicklY
Cons
- Can whip too much air into the batter
- Increases the risk of overmixing which tightens gluten
- Often needs a resting period even more
If you want the smoothest texture with the least risk, the whisk wins for most home cooks. The blender works well when time is tight, as long as you keep the mixing brief.
How to Make Crepes
Follow these steps to get thin and even crepes every time. Each step is broken down so you understand both the action and the reason behind it.
- Mix the base
In a large bowl, whisk the eggs with the milk, water and salt. Keep whisking until the mixture looks even. This helps the liquid blend smoothly with the flour later.
_compressed")
Add the dry parts slowly
Sprinkle in the flour a little at a time. Whisk gently at first so it blends without forming lumps. Once the flour is fully mixed in, pour in the melted butter. Whisk again until the batter becomes smooth and easy to pour. If it feels too thick, add a small splash of milk.
Rest the batter
Let the bowl sit for at least twenty minutes. This helps the flour absorb the liquid and gives the gluten time to relax so the crepes stay soft rather than tough.
Heat the pan
Warm a nonstick skillet over medium or medium high heat. Lightly brush the surface with a thin film of butter or oil. The goal is a slick surface, not a greasy one.
Pour and swirl
Measure about one quarter cup of batter for each crepe. Pour it into the center of the hot pan, then immediately lift and tilt the pan so the batter spreads into a thin circle. Moving fast here helps prevent thick spots.
Cook the first side
Let the crepe cook until the surface no longer looks wet and the edges begin to lift. The bottom should turn a light golden color. This usually takes one to two minutes.
_compressed")
Flip and finish
Slide a thin spatula under the edge, lift gently and flip. Cook the second side for about one more minute until lightly browned. Transfer to a plate and repeat until the batter is gone.
Serve warm
Enjoy them right away or fill them once the whole stack is ready.
Serving and Storage
Crepes are best eaten warm, but they store very well. Once cooked, stack them and cover lightly with a clean towel while you finish the batch. If you want to save them for later, let them cool fully. Place a small piece of parchment between each crepe, then store them in an airtight container in the fridge for up to three days.
For longer storage, freeze the stacked crepes in a freezer safe bag. Thaw gently at room temperature. Reheat in a warm pan for a few seconds on each side or in the microwave for a short burst to soften them.

The Tilt and Swirl Motion Key to Thin Even Crepes
This simple motion is the difference between a crepe that looks professional and one that feels patchy. As soon as the batter hits the pan, lift the pan with one hand and angle it slightly. Let the batter travel across the surface, guiding it in a smooth circular motion. The goal is an even layer that reaches the edges without leaving thick pockets. The motion must be quick because the batter begins to set almost immediately. With a bit of practice, the swirl becomes second nature.
The Greasing Trick How to Eliminate the First Crepe Dud
Many cooks joke that the first crepe is always a failure, but it does not have to be. The issue usually comes from too much butter or oil sitting in the pan. Instead of dropping a spoonful of butter into the skillet, lightly rub the surface with a small piece of butter or use a folded paper towel dipped in melted butter. This gives you a thin, even coat that prevents sticking without creating oily pools. With this method, the very first crepe cooks evenly and looks just as good as the rest.
Advanced Troubleshooting Fixing Common Crepe Mistakes
This section helps you solve the most frequent problems home cooks face. Each point focuses on what went wrong and how to fix it next time.
My Crepes Are Tearing What Went Wrong
Tearing happens when the pan is not hot enough or when the surface is too dry. A warm pan helps the batter set quickly, giving the crepe strength. A tiny amount of butter on the pan helps the crepe release without sticking. If the batter tears while flipping, wait a few more seconds before turning the next one. The edges should lift slightly and feel firm enough to handle.
Why Are My Crepes Too Thick or Rubbery
Thick or rubbery crepes usually point to one main issue. The batter did not rest long enough. When the batter sits, the gluten softens which leads to a tender result. If you skip the resting time the crepes tighten and feel chewy. Another cause is batter that is too dense. Add a small splash of milk or water until it flows easily from the spoon. A hot pan also helps the batter spread quickly which keeps the crepe thin.
Sweet and Savory Crepe Fillings Serving Ideas for Any Meal
Crepes shine because they adapt to any time of day. Their neutral flavor makes them perfect for breakfast, brunch, dinner or dessert. You can keep them simple with sugar and butter or turn them into a full meal with hearty fillings. Below are ideas that cover both sides so you can mix and match depending on your mood.
Authentic French Sweet Fillings Creme Chantilly and Sucre Beurre Sale
For a classic touch, fill warm crepes with a spoonful of thick creme Chantilly. The cream holds its shape and pairs beautifully with fresh berries. Another traditional option many French families enjoy is sucre beurre sale. This is simply a light spread of salted butter melted on the crepe followed by a sprinkle of sugar. The heat softens the butter and creates a sweet salty finish that feels nostalgic and comforting.
Top Savory Crepe Fillings Galettes
Savory fillings turn crepes into a full meal. The French style often starts with simple ingredients that bring plenty of flavor without extra effort. Popular choices include ham with melted cheese, sautéed mushrooms with spinach, soft scrambled eggs, smoked salmon with a touch of cream, or roasted vegetables with a mild cheese. These options work well because the crepe stays thin and flexible which makes folding or rolling easy. You can mix fillings to suit your taste and build a meal that feels warm and satisfying.
Make Ahead and Storage How to Freeze Crepes Batter and Cooked
Crepes freeze very well which makes them ideal for planning ahead. You can store both the batter and the cooked crepes. Batter goes into an airtight container and stays fresh in the fridge for up to two days. Cooked crepes should cool fully before stacking with small sheets of parchment between them. Place the stack in a freezer safe bag and freeze until needed. They thaw quickly and keep their soft texture when reheated gently in a warm pan.
Can I Prepare Crepe Batter Ahead of Time
Yes. Crepe batter benefits from resting which makes preparing it ahead a smart choice. Mix the batter and keep it in the fridge for up to twenty four hours. Before cooking, whisk it briefly to bring it back to a smooth consistency. If it feels thicker after chilling, add a small splash of milk or water to loosen it.
Storing and Freezing Cooked Crepes
Cooked crepes keep their soft texture if you store them properly. Let each crepe cool fully before stacking. Place a small piece of parchment between them to prevent sticking. Slide the stack into an airtight bag or container. In the fridge, they stay fresh for up to three days. For longer storage, freeze the stack and remove only what you need. To reheat, warm each crepe in a pan for a few seconds or use a brief microwave warm up to bring back softness.
Helpful Notes
A few small habits make a big difference. Use a nonstick pan for the easiest release. Keep the heat at a steady medium level so the batter cooks evenly without burning. If the batter thickens as it rests, a small splash of water or milk brings it back to the right pourable texture. Stir the batter now and then while cooking to keep the flour from settling at the bottom. If you want extra flavor, add a tiny drop of vanilla or a pinch of sugar for sweet crepes or a pinch of herbs for savory ones.
Conclusion
This crepe recipe works because it keeps things simple and dependable. The batter mixes quickly, spreads smoothly and cooks into thin crepes that stay flexible for any filling you enjoy. Whether you prepare them for a quiet breakfast or a table full of guests, the result feels warm and satisfying. If you try this recipe, I would love to hear your thoughts. Leave a comment and a star rating to share your experience. Feel free to post your creations on Pinterest or Facebook too. What fillings did you choose? Tell me below and inspire other readers.
Frequently Asked Questions FAQ
What are the ingredients for a crepe?
A basic crepe uses simple pantry staples. You need eggs, all purpose flour, milk, water, a small amount of salt and a little melted butter. These ingredients create a thin batter that cooks into soft and flexible crepes.
What is the secret of a good crepe?
The secret is a smooth batter and proper resting time. Letting the batter rest allows the gluten to relax which leads to a tender texture. A lightly greased hot pan also helps the crepe set quickly and cook evenly.
What is the secret to thin perfect crepes?
A thin crepe starts with a runny batter. It should pour easily and spread fast. The tilt and swirl motion is key. As soon as the batter hits the pan, lift and rotate the pan so the batter reaches the edges in one smooth motion.
Is pancake batter the same as crepe batter?
No. Pancake batter contains baking powder which makes pancakes rise and turn fluffy. Crepe batter has no leavening so it stays thin and flat. Crepes also use more liquid which makes the batter runnier than pancake batter.
How long should crepe batter rest?
Aim for at least twenty minutes. One hour gives the best texture. Resting softens the gluten and lets the flour absorb liquid evenly which keeps the crepes from turning rubbery.
How do you store and reheat cooked crepes?
Let cooked crepes cool completely before stacking. Place parchment between each one and store them in an airtight bag. They keep in the fridge for three days or in the freezer for a longer time. Reheat gently in a warm pan or give them a short microwave warm up until sofa.
For delicious and easy recipes, follow me on my Facebook and Pinterest
